A few months ago I finished this triptych, now called “GOING GOING GONE”, but it sat around in the studio waiting for framing inspiration. Well, that inspiration finally showed up in the form of cork foam board, an orphaned 12×26″ frame, and a whole lot of JB Weld epoxy glue.
If you’re interested in the details of this artwork, follow the link to the post in the above paragraph. Otherwise, read on to learn about the challenging world of custom framing, at home, with nary a YouTube DIY video to be had.
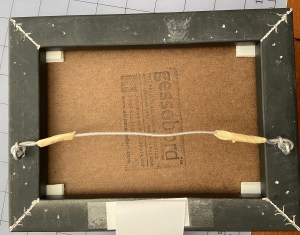
Challenge #1: How does one attach wood blocks to a frame without backing? I was headed down the path of cutting a custom wood back, but then I stumbled across a 1/4” thick foam board while looking for balsa wood as a lighter alternative to plywood. I also happen to have a matt cutter, which is much more finger friendly than my rotary saw, which is buried somewhere in the garage.
Challenge #2: How to attach foam board to frame? Also known as “glue or screw?” I was leaning screws, but as I was digging through my massive drawer of miscellaneous art crap, I came across a tube of JB Weld, an epoxy glue that’s stickier than a wet booger. Despite having been used once in the past, probably more than 3 years ago, it still worked!
Challenge #3: What was the best way to affix the wood blocks to the newly added foam core backing? See aforementioned sticky booger solution. But, the trickiest part was ensuring the 3 blocks, all of which are different sizes, were lined up properly. I’m positive there’s a better way to do this, but I opted to use a center string and blue tape at right angles to ensure the blocks were glued in the right spot.


Surprisingly, it worked out! I used the cork side of the foam board so I didn’t have to paint the white side, and I kinda liked the light brown coloring, which looked like a porter or amber beer. The best part, which my wife pointed out, was that by using the cork side for the backing, it was similar to a coaster bottom… like for a cold pint of beer… get it?
This piece will likely be added to my solo show, “Something for Everyone”, at Kerbey Lane Cafe in San Marcos, Texas, available for the reasonable price of 10 cases of Guinness or (512) Pecan Porter.
Thanks for reading!