PB&K

Say hello to PB&K the latest addition to the Dog Toys series, although it might be more appropriate to start a new sub-category called “Cheeky Still Life”.

The Kong was done with a painting knife to give it the subtle texture of a well worn, go-to Fido favorite. As any dog lover would attest, especially the big chewers, a peanut butter stuffed Kong is a great source of entertainment… and protein. Even the most hearty chewers have trouble putting a dent in one of these rubber wonders, but they do lose their sheen and get a roughed up look over time. By contrast, the (creamy) peanut butter and the remainder of the composition is all impasto-free brushwork.

Ultimately, the intent of the composition is to make every dog parent look, nod, and laugh at the reality of what we’re all willing to do for our lovable canine companions.

  • Oil on canvas paper, 8″x10″
  • Palette knife and an array of brushes (rounds and flats)
  • Key colors
    • Peanut Butter – Yellow Ochre, Naples Yellow
    • Kong – Ivory Black + Ultramarine Blue, Burnt Sienna + Ultramarine Blue

A Stuffed Kong and Its Dog

I recently saw a question on Quora asking “when does drawing end and painting begin?”, which was a timely inquiry given a new approach I’ve been taking with some recent paintings. It’s always a bit tricky and, frankly, pretty intimidating to take on a new type of composition. For me, that tends to be something that involves shapes and/or subject matter that’s new or unfamiliar. In one of my current projects, A Stuffed Kong and Its Dog, I came to realize that while the subject of a dog toy was not a new compositional challenge, the complexity of a dog chewing and pawing something was really friggin’ hard!

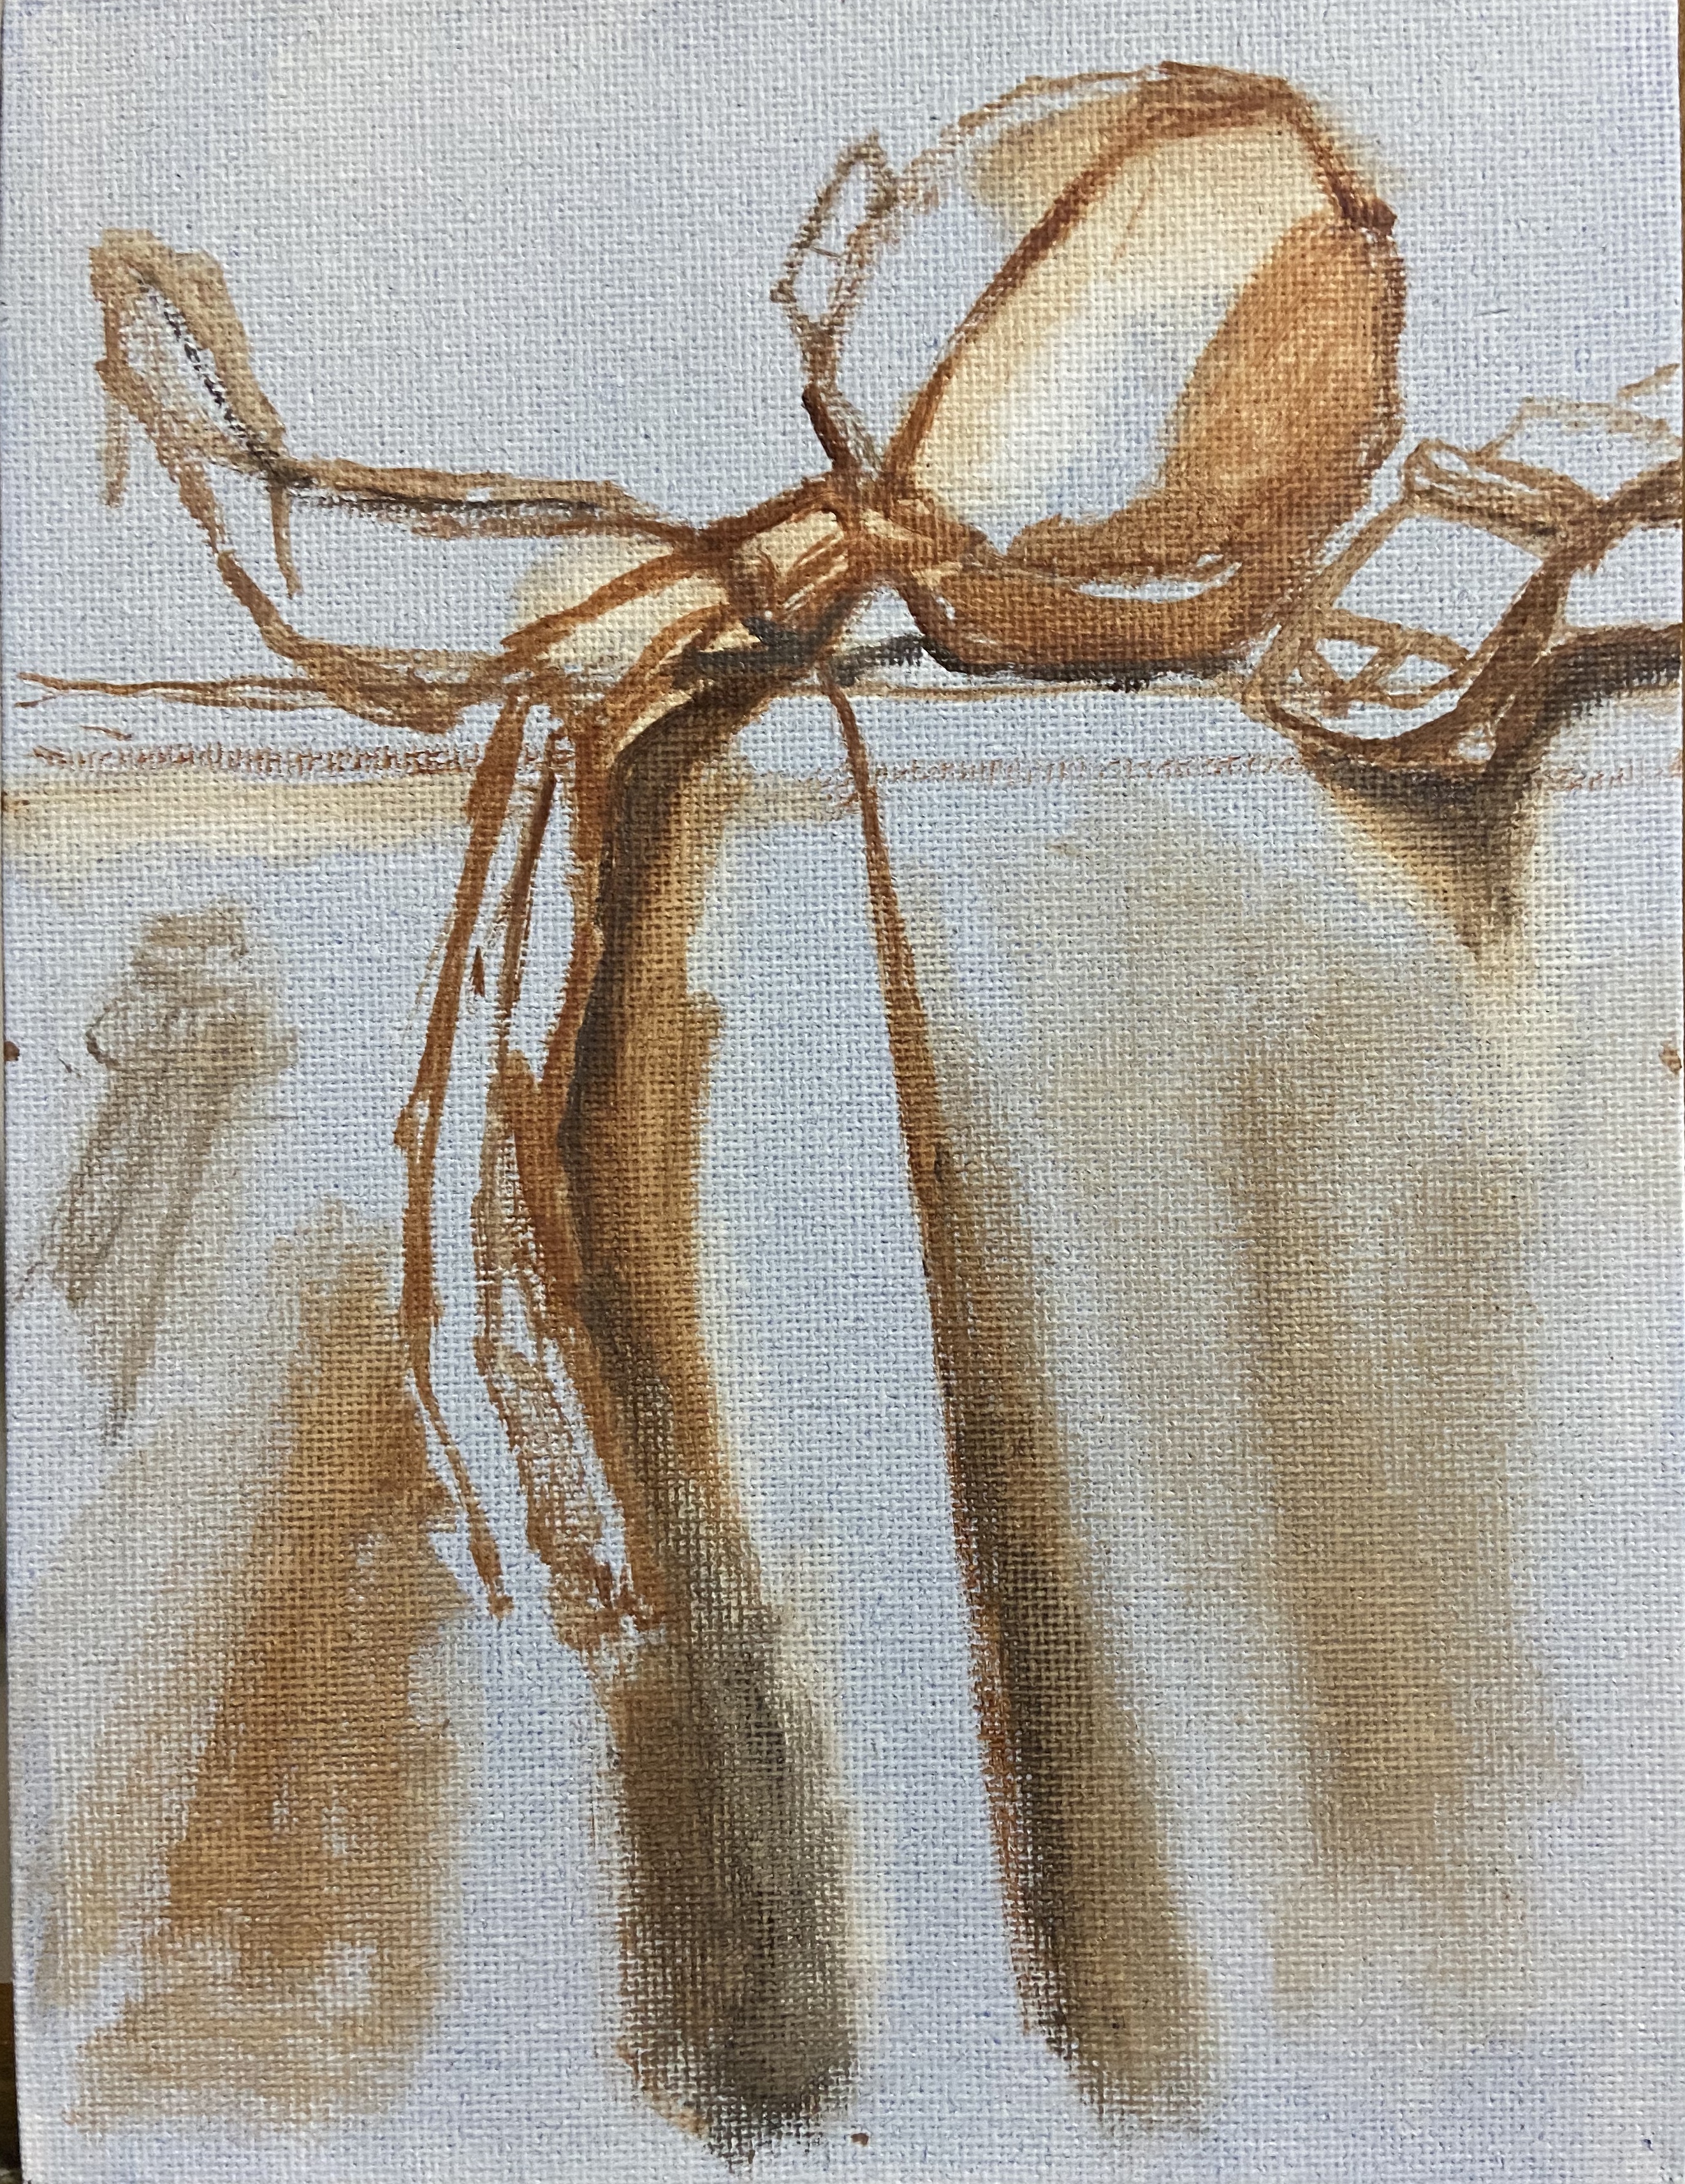
My normal process, and what’s been reinforced at workshops by artists far more experienced and talented than myself, is to do a study of the subject to help get a feel for the composition (see Dances With Squirrels blog post for more on studies). I prefer sketching as opposed to small paintings, largely because I like to sketch, it’s more expedient than painting, and it’s more flexible, i.e. erasing graphite is infinitely easier than wiping out paint. Lately, however, I’ve been refining this process whereby I still do an initial sketch before starting the painting, but as I work through the project and run into challenges, I go back to the sketch and either do another or simply refine the one I was working on earlier.

In hindsight it’s frankly a brilliant idea, of which I don’t have many, because the pause from the painting a) makes me breathe as I gather my thoughts to overcome the problem, and b) let’s me return to an existing sketch and figure out how to navigate a solution based on a similar composition. What I’ve found thus far is that I often find the same problem in the original sketch, kicking myself for not having seen the problem in the first place, but I can quickly figure out how to make changes and move forward.

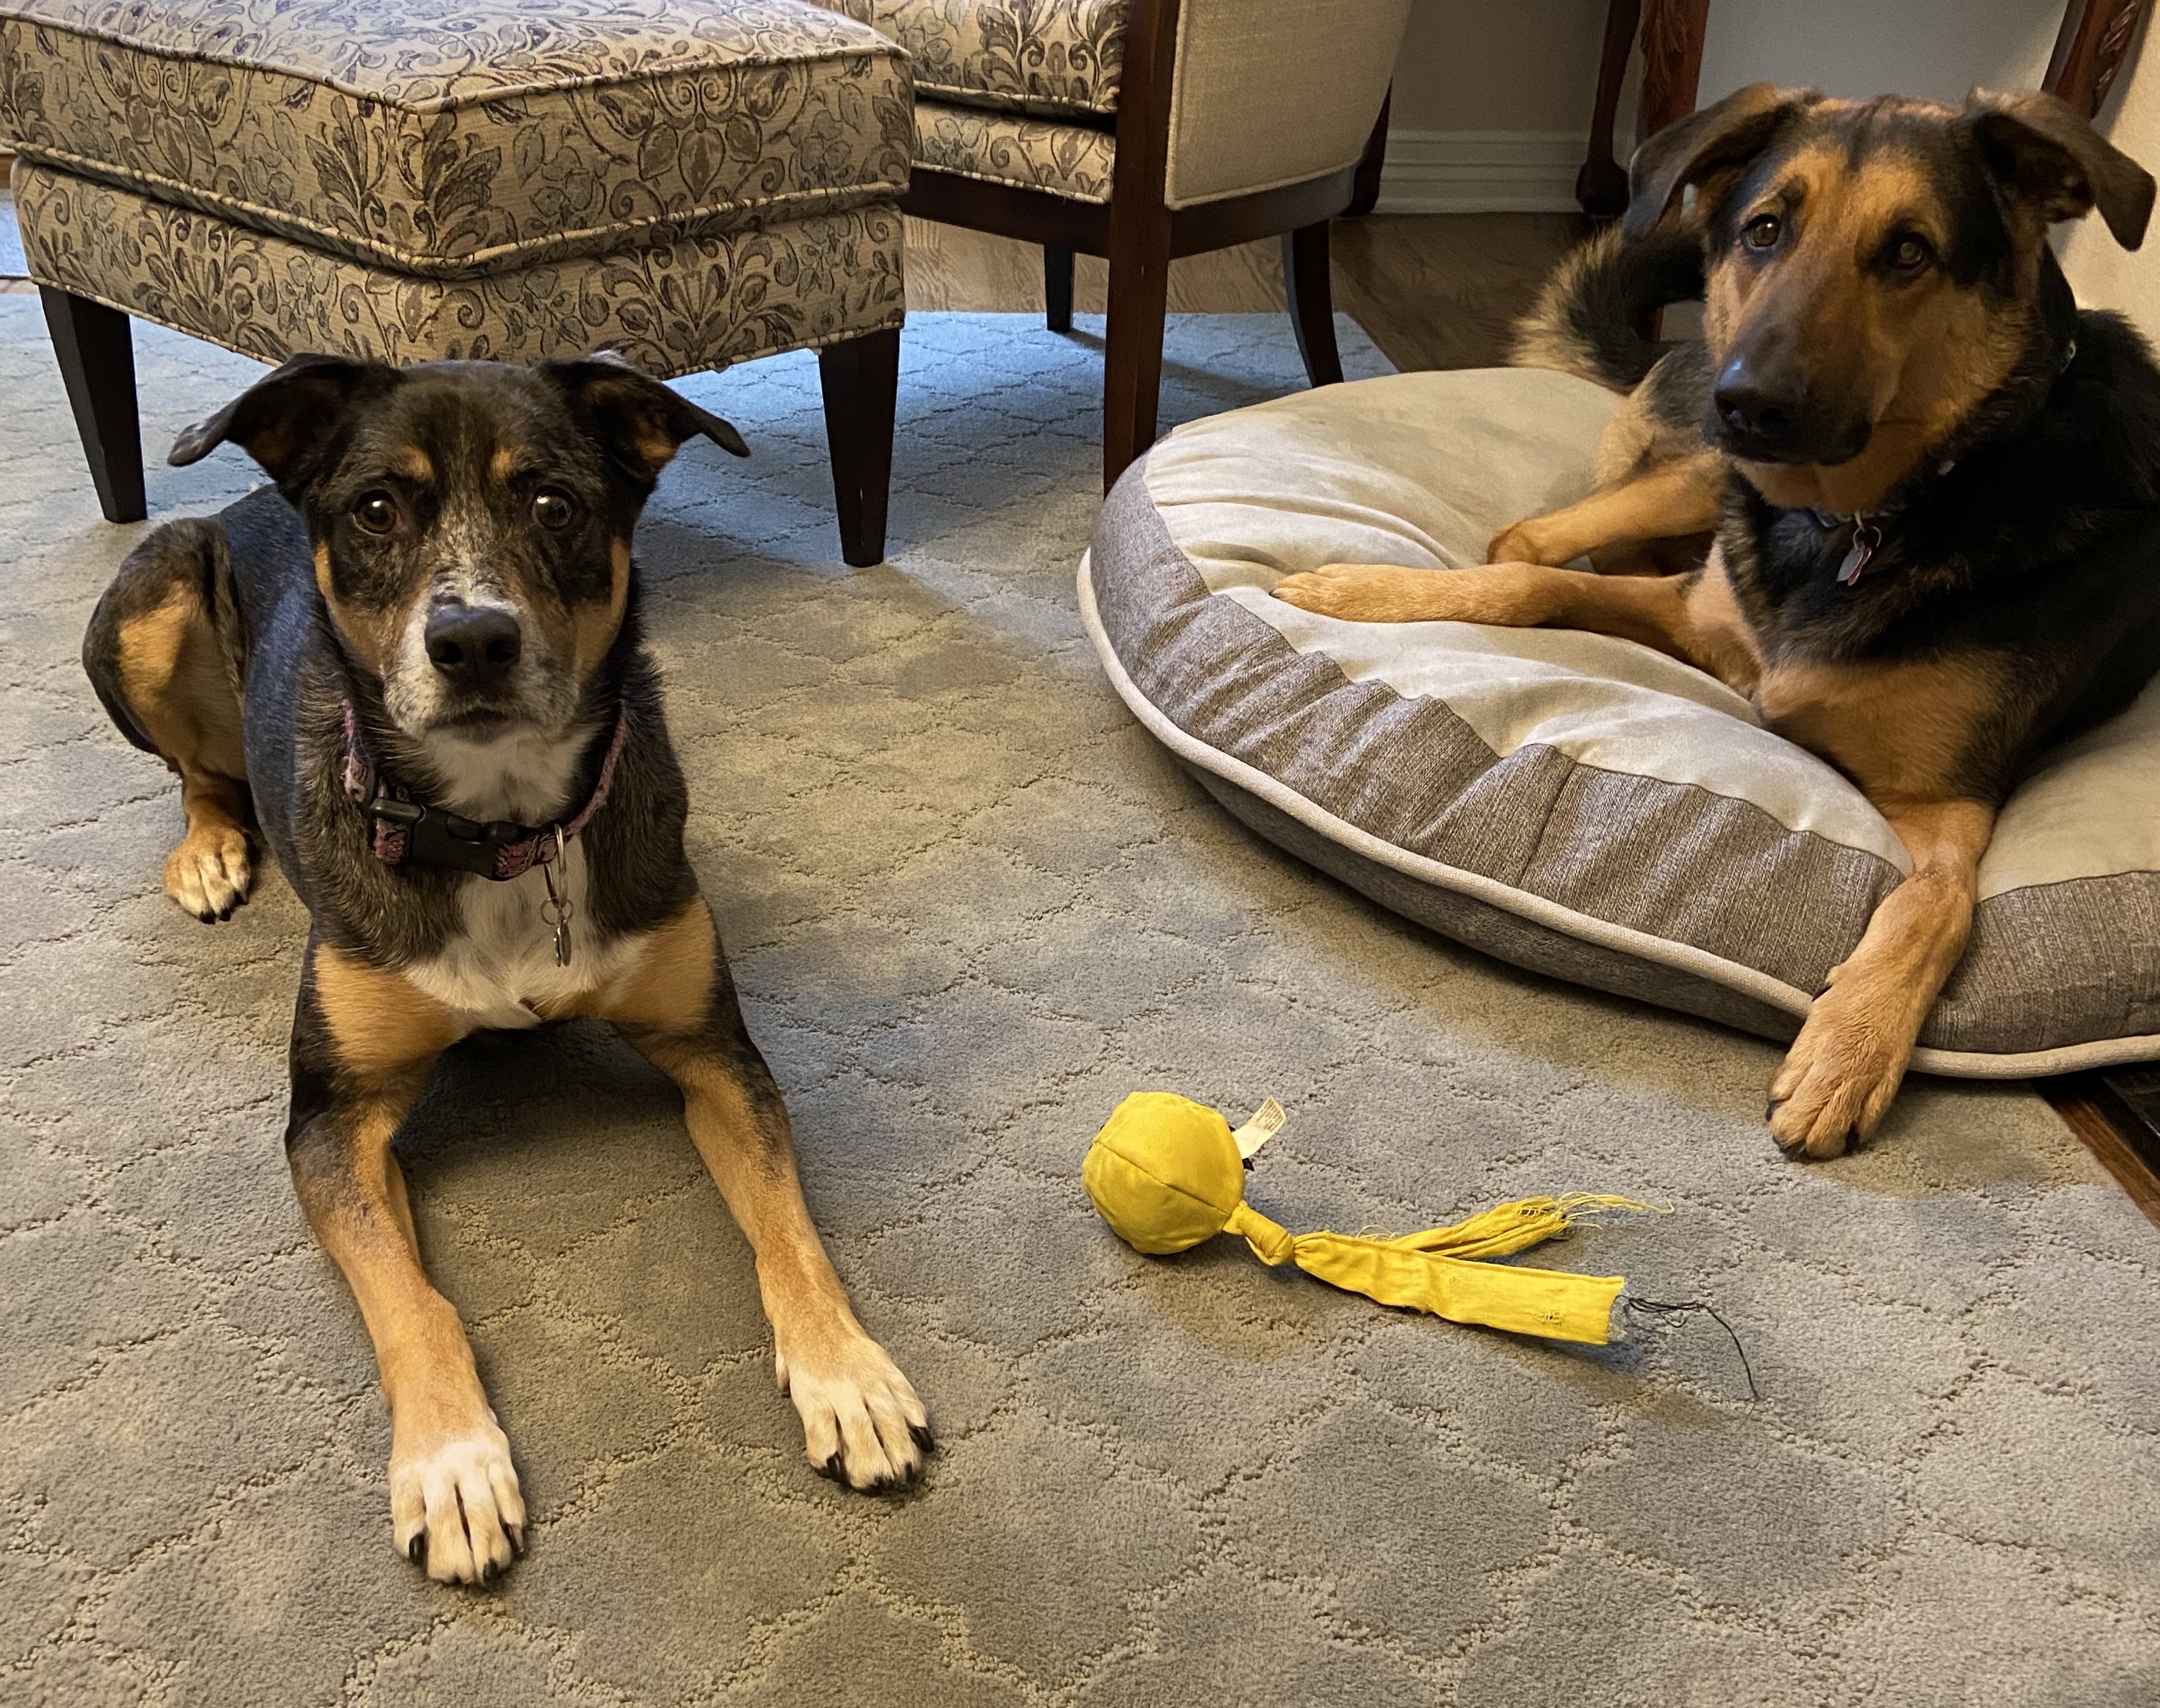
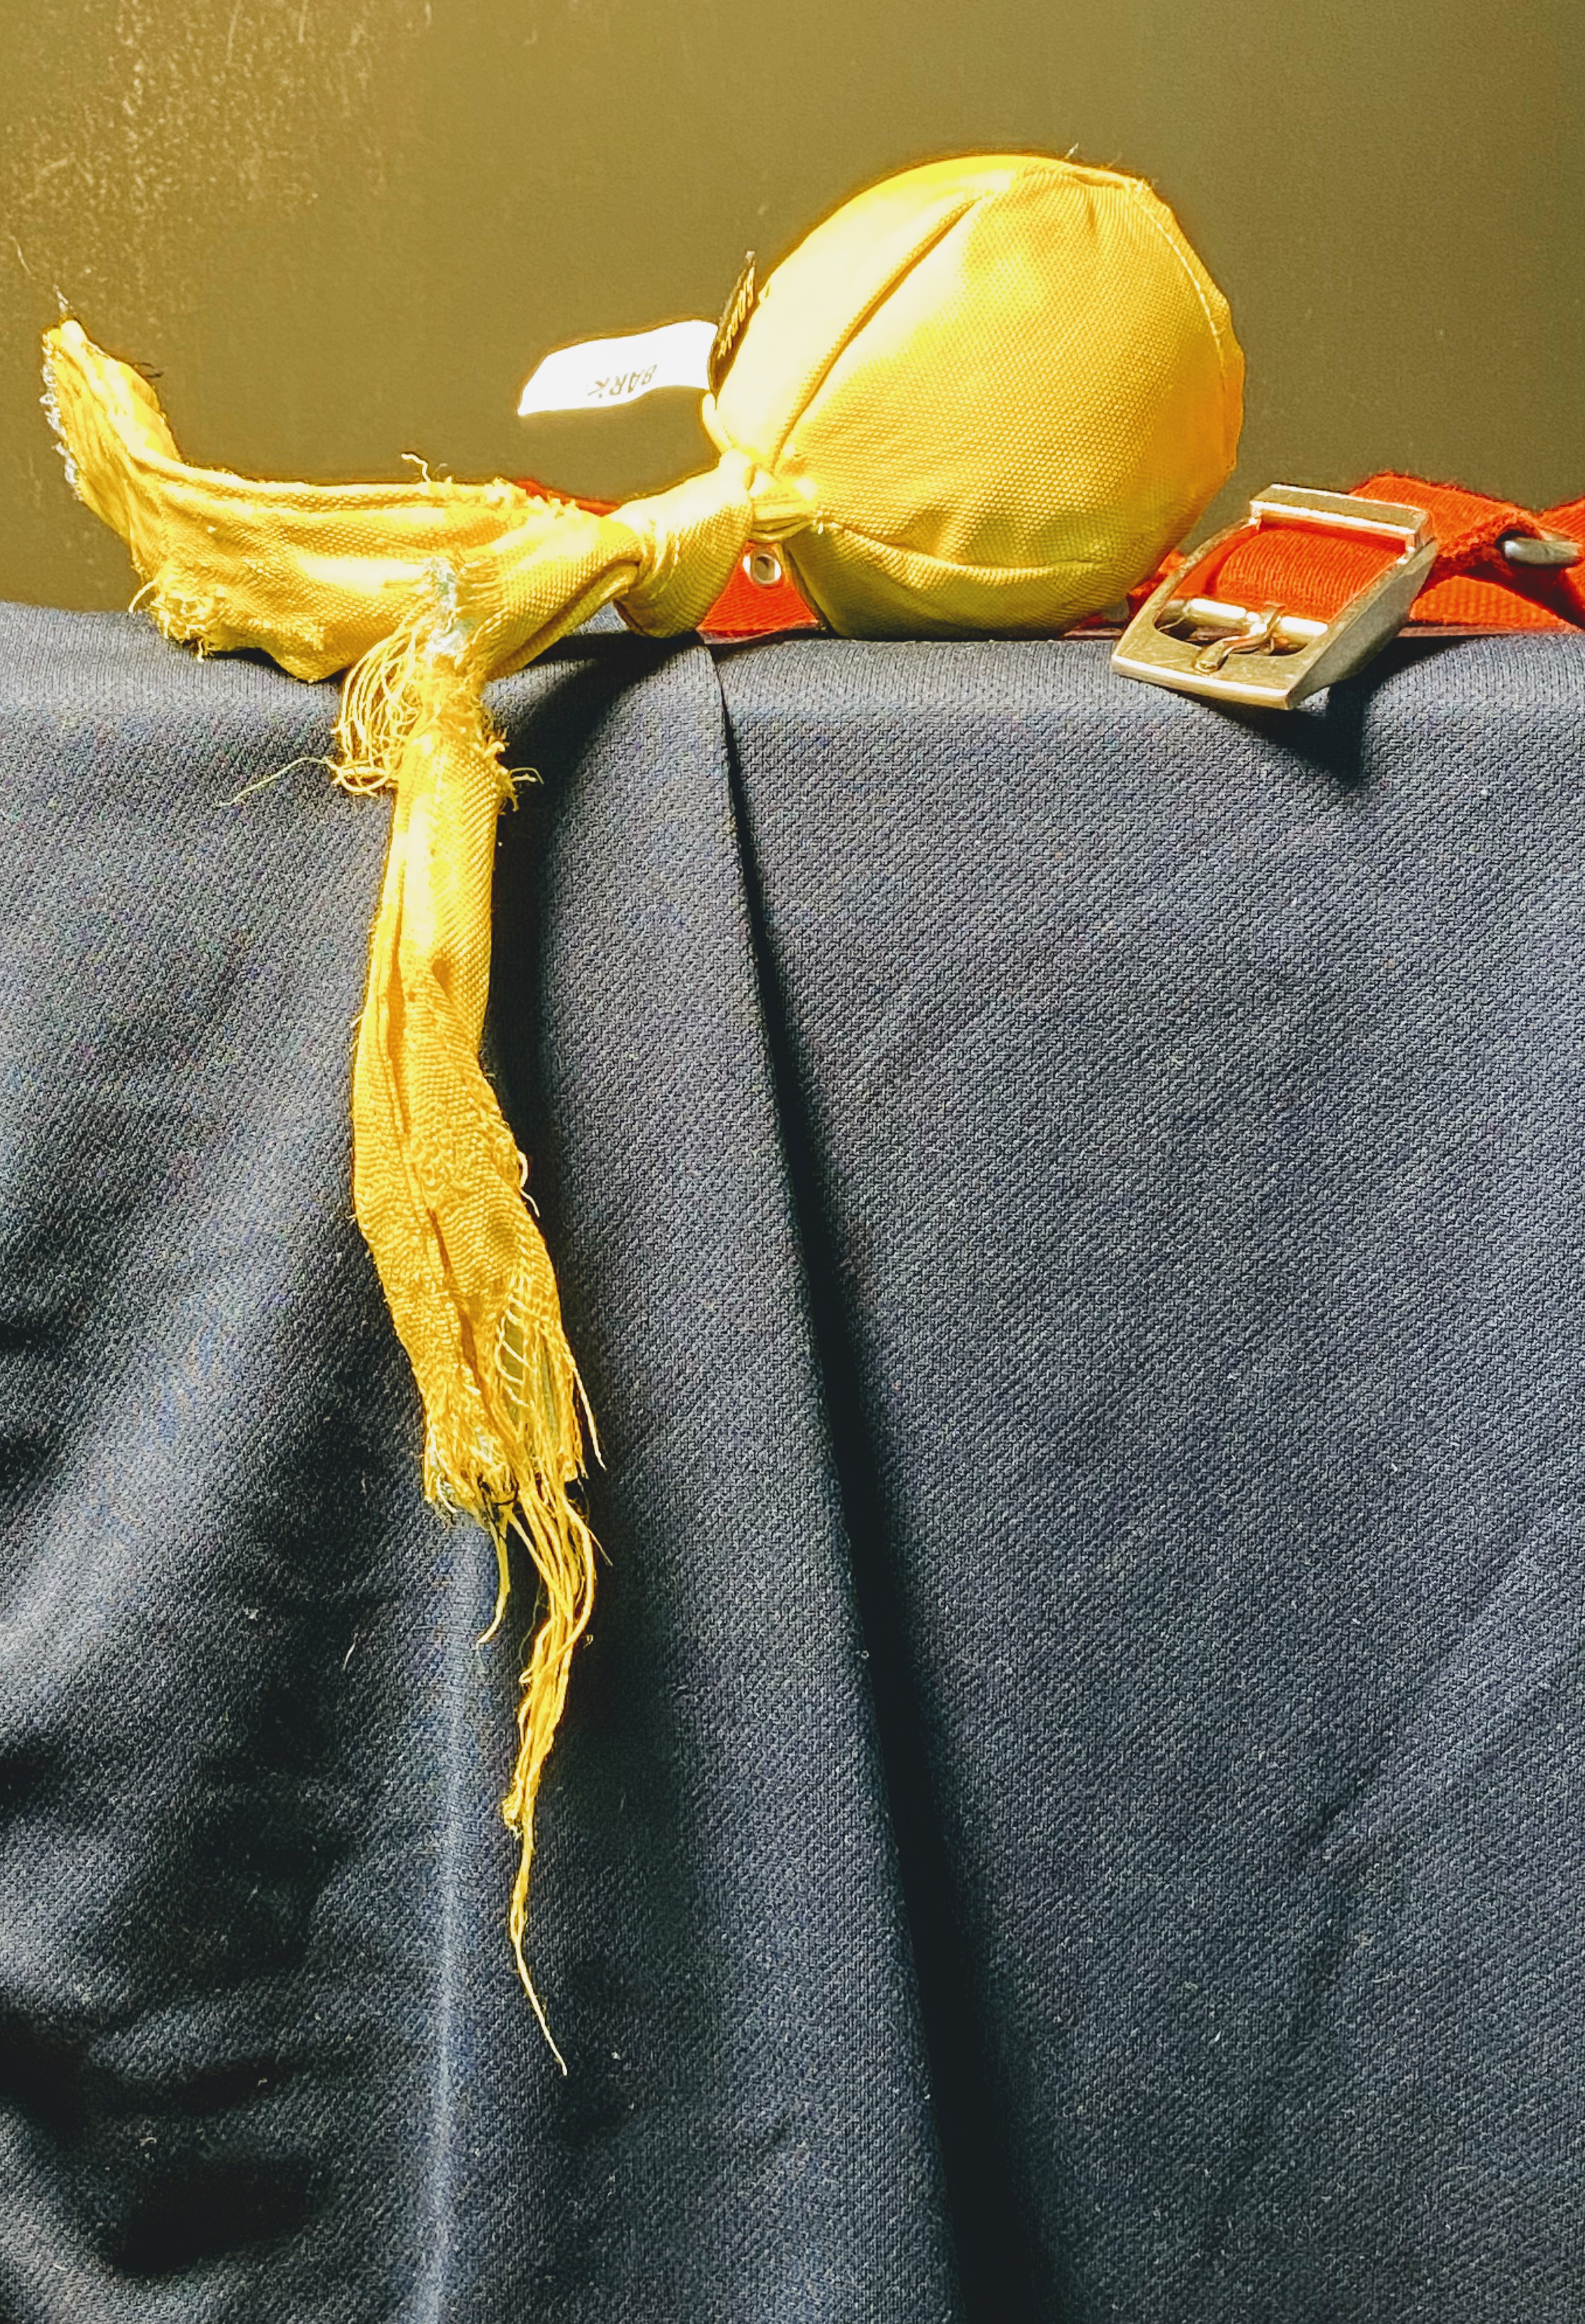
In A Stuffed Kong and Its Dog, you can see the original sketch being reworked (I forgot to take a picture of the original state of the sketch) when I ran into 2 problems. First, there was something fundamentally wrong with the Kong dog toy shape, which became clear when I returned to the sketch and saw that the bottom planes of the humps were misaligned. Secondly, I thought the size of the Black Lab’s right paw was too big once I painted it, but when I returned to the sketch and redrew it, I found that the size was actually fine and the issue was the related to the size of the black fur shadow gaps between the toes. Clear as mud, right?

The final painting will need a few minor refinements, but I want to let it dry before I make those updates. I’ll update this post when it’s really done. The intrigue with this piece is to make the viewer wonder what in the world is in that stuffed dog toy Kong! It was very hard to translate the focus and excitement of the dog as it diligently worked to get to the yummy treats out of this toy. While the focal point is the Kong, the supporting cast is the nose and that huge right paw, which in combination should convey the canine treat obsession.

Lastly, I’m not pleased with the sketch or the painting. The sketch is not supposed to be a finished work, and is muddled with various experiments to see what was going to work, so I’m. not flustered it. However, the finished painting, while not intended to be a refined piece of exceptional artwork, is ultimately a composition that doesn’t work well. The angle of the nose looks wrong relative to the muzzle, but it’s actually accurate as most dogs are able to bend that nose around in weird ways. That said, it doesn’t convey well in the painting. The large paw also creates visual confusion and seems out of place even though it’s proportionally accurate.

This exercise has taught me that all compositions aren’t destined for a “real painting”, but that’s why we do studies and small pieces to see how it plays out. I’ve also learned that my dog portrait skills need a lot of work, something I knew already, but this work has highlighted the gap and is proving to be quite motivating to start sketching my dogs’ faces!


“Framecro” – Fast Framing on the Cheap!

Framing artwork used to be a dreaded task, but over the years I’ve come to really enjoy it. This is especially true as we start 2020 because I recently had 4 dog related pieces accepted to an Austin art show at Art for the People gallery called Celebrities – Pet & People Portraits. Future posts this week will provide more details about the show and the inspiration behind the pieces, but I wanted to share some creative custom framing ideas I used with 2 of the pieces in the show.
One of the troubling issues with framing is the commitment, secondarily the cost and complexity. The process of “properly” framing a painting often involves sealing it inside a frame in a way that makes getting it out an ordeal. When I hang finished art in my home, I can easily get bored of the frame after a year, or simply want to change the art that’s in the frame. To solve this problem, I came up with a Velcro based solution that works great with small pieces in floater frames, whereby you affix the piece with Velcro instead of glue or some other fixative, which allows you to swap out pieces in the same frame. This is handy for your personal art at home, gallery shows or events.
The steps to frame using Velcro, a process I’ve trademarked as “framecro“, are very simple, fast, and inexpensive. Let me know if you opt to framecro any of your paintings; improvements to the process are always welcome.
  1. Most Velcro types will work, but the Command line of snap-type from 3M is what I prefer. They market it as a picture hanging velcro because it snaps together very tightly, but you can still pull it apart easily.
  2. Cut 4 twin sets of velcro rectangles, which means you have 8 total rectangles of Velcro. These should be relatively small and easily fit into the 4 corners of the frame.
  3. Affix the velcro to the corners of the frame and the corners of the back of the artwork.
  4. Align the artwork and press it onto the frame.

You’re done! If you want to swap out a piece, just pop out the existing piece of art and press in a new one that has Velcro in it’s corners.

Yellow Ball with Tails

Yellow Ball with Tails
Oil on canvas board, 6″x8″
Sometimes you just know a composition is going to work, virtually able to paint itself. Yellow Ball with Tailswas exactly that kind of composition. Wolfgang and Zip loved this toy because the 2 tails made it tug-a-licious! As the designated thrower, I liked it because the ball made it easy to throw without getting dog slime all over my fingers.  Ultimately, this toy stayed inside and lasted about 20 play sessions before parts started to get ripped off and chewed up.
I’ve recently made some adjustments to my still life setup, changing the platform so it’s higher and is at sitting eye level. This gives a new angle that’s easier for me to translate to the canvas.
This piece moved quickly and was done in a couple of sessions this week. As I stated earlier, this composition looked great from the start and I knew it was going to be a fun project when I saw all that bright yellow shredding dangling against that blue background. Definitely going to spend more time on compositional arrangement with future dog toy paintings.
The canvas board was ideal for this type of toy because it has a lot of toothy texture, which easily lends itself to the toy’s material. The only thing I don’t like about a canvas board for this type of piece is the fine detail of the threads. The canvas texture makes it very hard to paint a thin line, so I often had to do some back and forth with the darker background color to get the thread lines just right, basically painting back into the yellow thread line to reduce the width.
There’s a lot of yellow in this piece, and I did some experimentation:
  • Deep Yellow + Titanium White as the base for the mid-range yellows. Added Ultramarine Blue and Cadmium Red Light in small doses for the shadows on the ball. 
  • Cadmium Lemon + Titanium White for the lighter areas. 
  • Indian Yellow, which I don’t typically use often, here and there to vary the lighting along some of the longer sections of the tails. 

The blue cloth was Ultramarine Blue and TW with variations of green made from Cad Yellow Deep and Cad Red Light. 

 
Originally, I had included the tag on the toy, but once the piece was 90% done the tag looked too distracting and didn’t add a lot of value, so I took it out. 
 
For those interested in the toy itself, it came from BarkBox, a monthly dog toy subscription service. Our dogs destroy toys, much to my artistic delight, so BarkBox has had to adjust what they send us to try and find toys that are good for tugging but also very durable.  Supervised play is the best solution for our fur balls because once they’re done tugging, it turns into keep away, which devolves into a game of “I’m going to eat this so you can’t have it”. Somewhere between keep away and vindictive chewing is when I like to step in and save the toy. If I was going to rate this toy, it would go something like this (1-10 scale):
  • Tugability 8 – withstood some strong tug sessions between my large dogs (Zip 50 lbs, Wolfy 85 lbs )
  • Durability 6 – hard for a canvas toy to rate higher than a 7, so this is pretty good
  • Versatility 8 – this could have easily been used inside or outside, both for fetch or tug. 
  • OVERALL 7

Yellow Ball with Tails - Dogs
Zip and Wolfgang – Dog Artists

Yellow Tail Ball - ref photo
Reference photo – Yellow Ball with Tails

Yellow Tail Ball block in
Block in of dog toy

Yellow Tail Ball 1
Started with the yellows

Yellow Tail Ball 2
First paint draft done

Yellow Tail Ball 3
Working details

Yellow Tail Ball 4
Fine details of shredded threads

Yellow Tail Ball Final
Finished Yellow Ball with Tails dog toy