Going Big!

Started a new project this past week. I won’t reveal the final design details, but suffice to say its going to be very different from anything I’ve done so far in many ways:

  • No reference photo: Instead it’s inspired by my wife, who is the source of this great idea, and it’s something very personal for both of us. While I don’t have the convenience of a picture to look at whenever I need guidance, I get to collaborate with her and evolve the idea together as it comes out of her imagination.
  • This is BIG! At least for me. This is going to be twice the size of any work I’ve done in the past – 24″ x 36″.
  • The technical challenges are very different, too. At first I thought it would be much easier because I’m using mostly just 2 colors, but neither are straight from the tube, which means the need to mix enough volume to cover the entire area is something of a challenge, which I didn’t realize until I was already running out of the first batch. You really have to mix a large volume up front so the area is covered in a contiguous hue, or else it will look uneven, i.e. the top half will look darker, lighter, duller, etc than the bottom half. In a landscape painting, even a large piece, you can get away without worrying about slight variations because you use it around the entire piece to create depth and texture to the objects, but this is a modern piece that needs continuity (at least for part of it.. hint hint of what’s to come) throughout.
  • The other technical challenge is doing the large heart shape freehand. I didn’t use a stencil, and actually took some time to create a demo piece on a much smaller scale to get the proportions and shape aligned with what my wife wanted. Then it was a matter of dusting off some high school math on ratios to translate to the larger format, i.e. the 10″ x 11″ heart is what dimension on the 24″x36″ canvas? Patience on the drawing front paid off.

The photos below show the staging and completion of stage 1. I promise you, stage 2 and the challenges involved will be very exciting, so stay tuned for updates in the coming week.

IMG_3528 Reference drawing/painting. This was used to get the palette choices figured out and the proportions and shape of the heart established. The original idea was red on yellow, but all we could see was McDonalds, which led to a lot of laughter as we tested out new background options. The baby blue was final decision. The heart is cadmium red + a little white + a little permanent green light. The blue is Titanium White + a little Pthalo Blue. Looks greenish on this test piece b/c the yellow was bleeding through.

IMG_3530

This is what 24×36 looks like on my easel. It dwarfs the pieces stacked up on the floor – still dealing with renovation messes, so all the art isn’t back up on our walls yet.

IMG_3531

Transferred to the canvass, the red heart is looking great!

Finished with Phase 1 after getting the blue background slathered on. Getting the line crisp along such a large object made my shoulder ache, but it was great practice for painting adjacent wet paints. No easy feat, especially with the curvatures of the heart. I had to rotate it around the easel many times to get the right painting angle.

The color combination in real life is a little less saturated, but it works really well together. Hats off to my wife for making the palette call on this one. I wouldn’t have thought to go with such bright hues, but it works really well. Finally, the picture doesn’t show the texture contrasts – I used a palate knife for the blue area and brush for the heart. More on that later.

IMG_3533

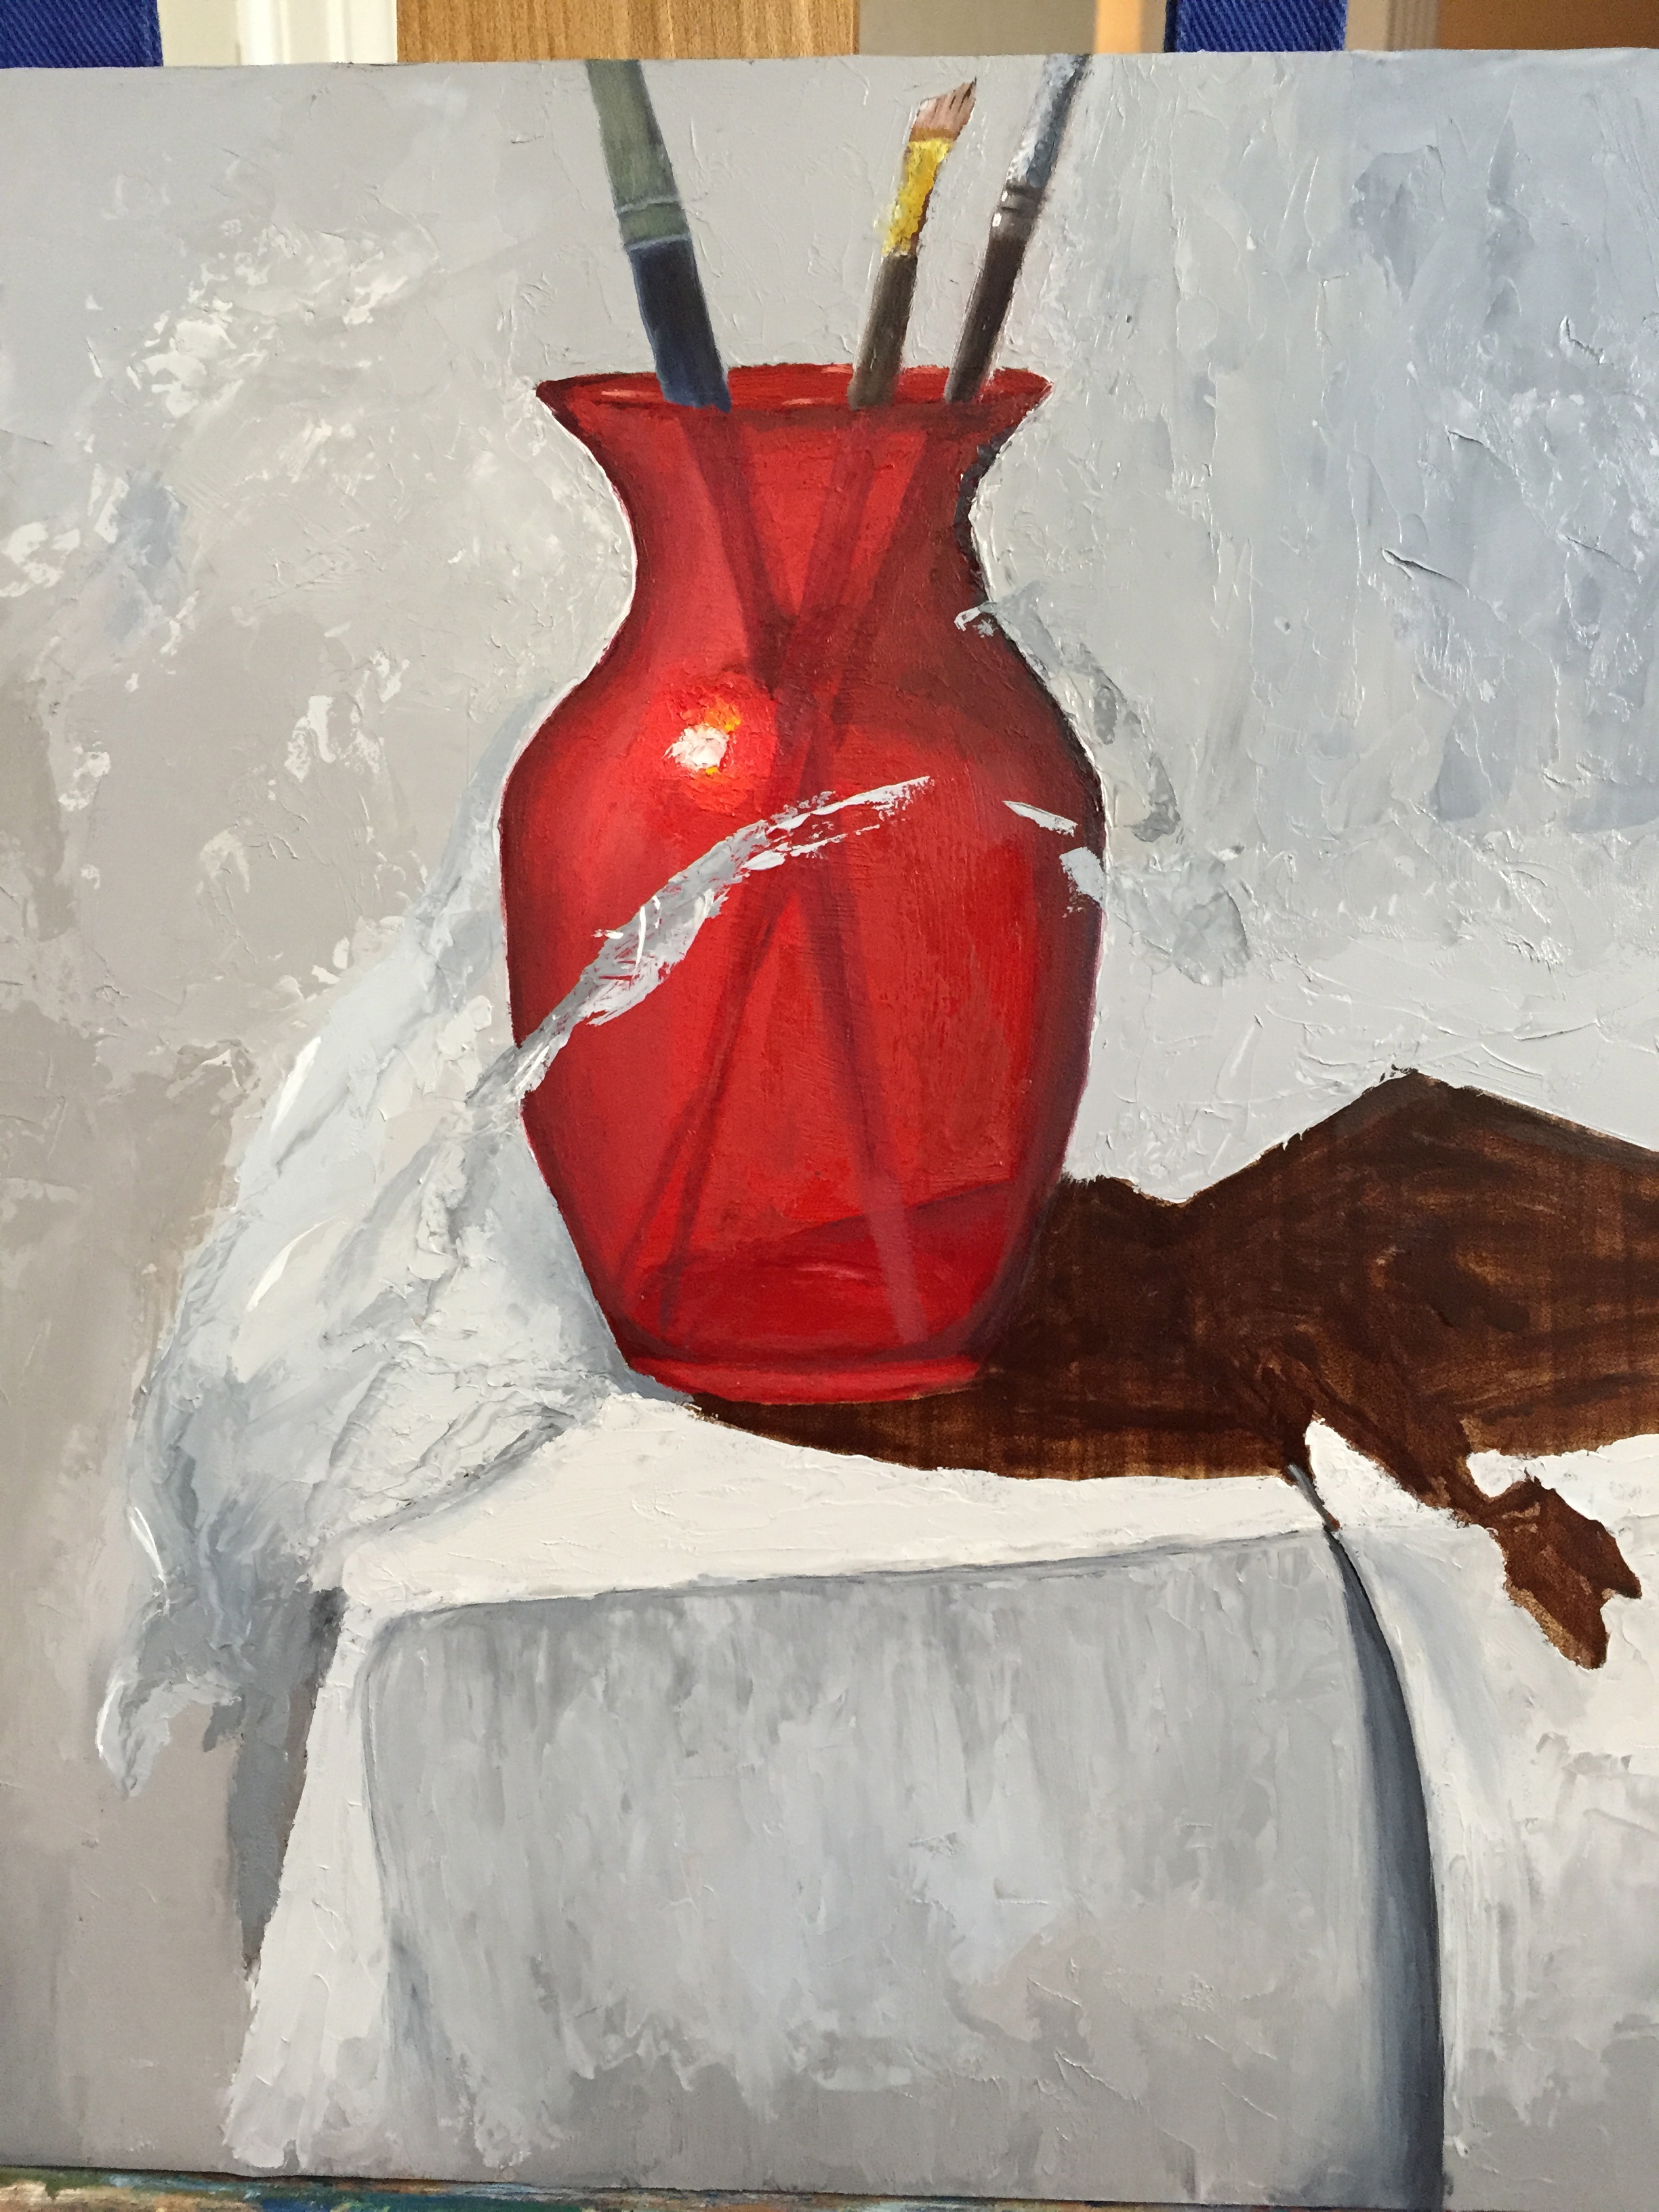
Red Vase in Cellophane: DONE

IMG_3083

Did a pivot back to the “canvas” today, so Daily Sketch continues tomorrow.

I returned to the challenge of the cellophane wrapped vase, having run into numerous problems that I just couldn’t figure out. But after some time to think through why the cellophane just didn’t look right, I came up with 3 primary issues to fix:

  1. Too many highlights. The painting looked like it had run into a bird poop tornado! Luckily I had learned how to remove these with a painting knife from the Cheifetz workshop last month; added some pics of the removal of one of the offending highlights.
  2. The highlights were to rounded. The cellophane highlights should be at hard angles which helps give the sense of stiff shapes, as opposed to softer material like fabrics.
  3. The values were wrong. Needed warmer grays on the light source side (left) and a wider range of lights.

In the end, I’m pleased with the results given it was a first effort with this somewhat complicated medium. Next time I will make sure the wrapping of the still life object is done with more purpose and in tighter bunches. This composition was poorly designed on my part. The cellophane was a loose gathering on the left side and lacked enough tight fitting accents, which would have made it easier to interpret.

Light pressure on knife…
IMG_3081
… and the highlight slides right off!

Red Vase and Cellophane – Update

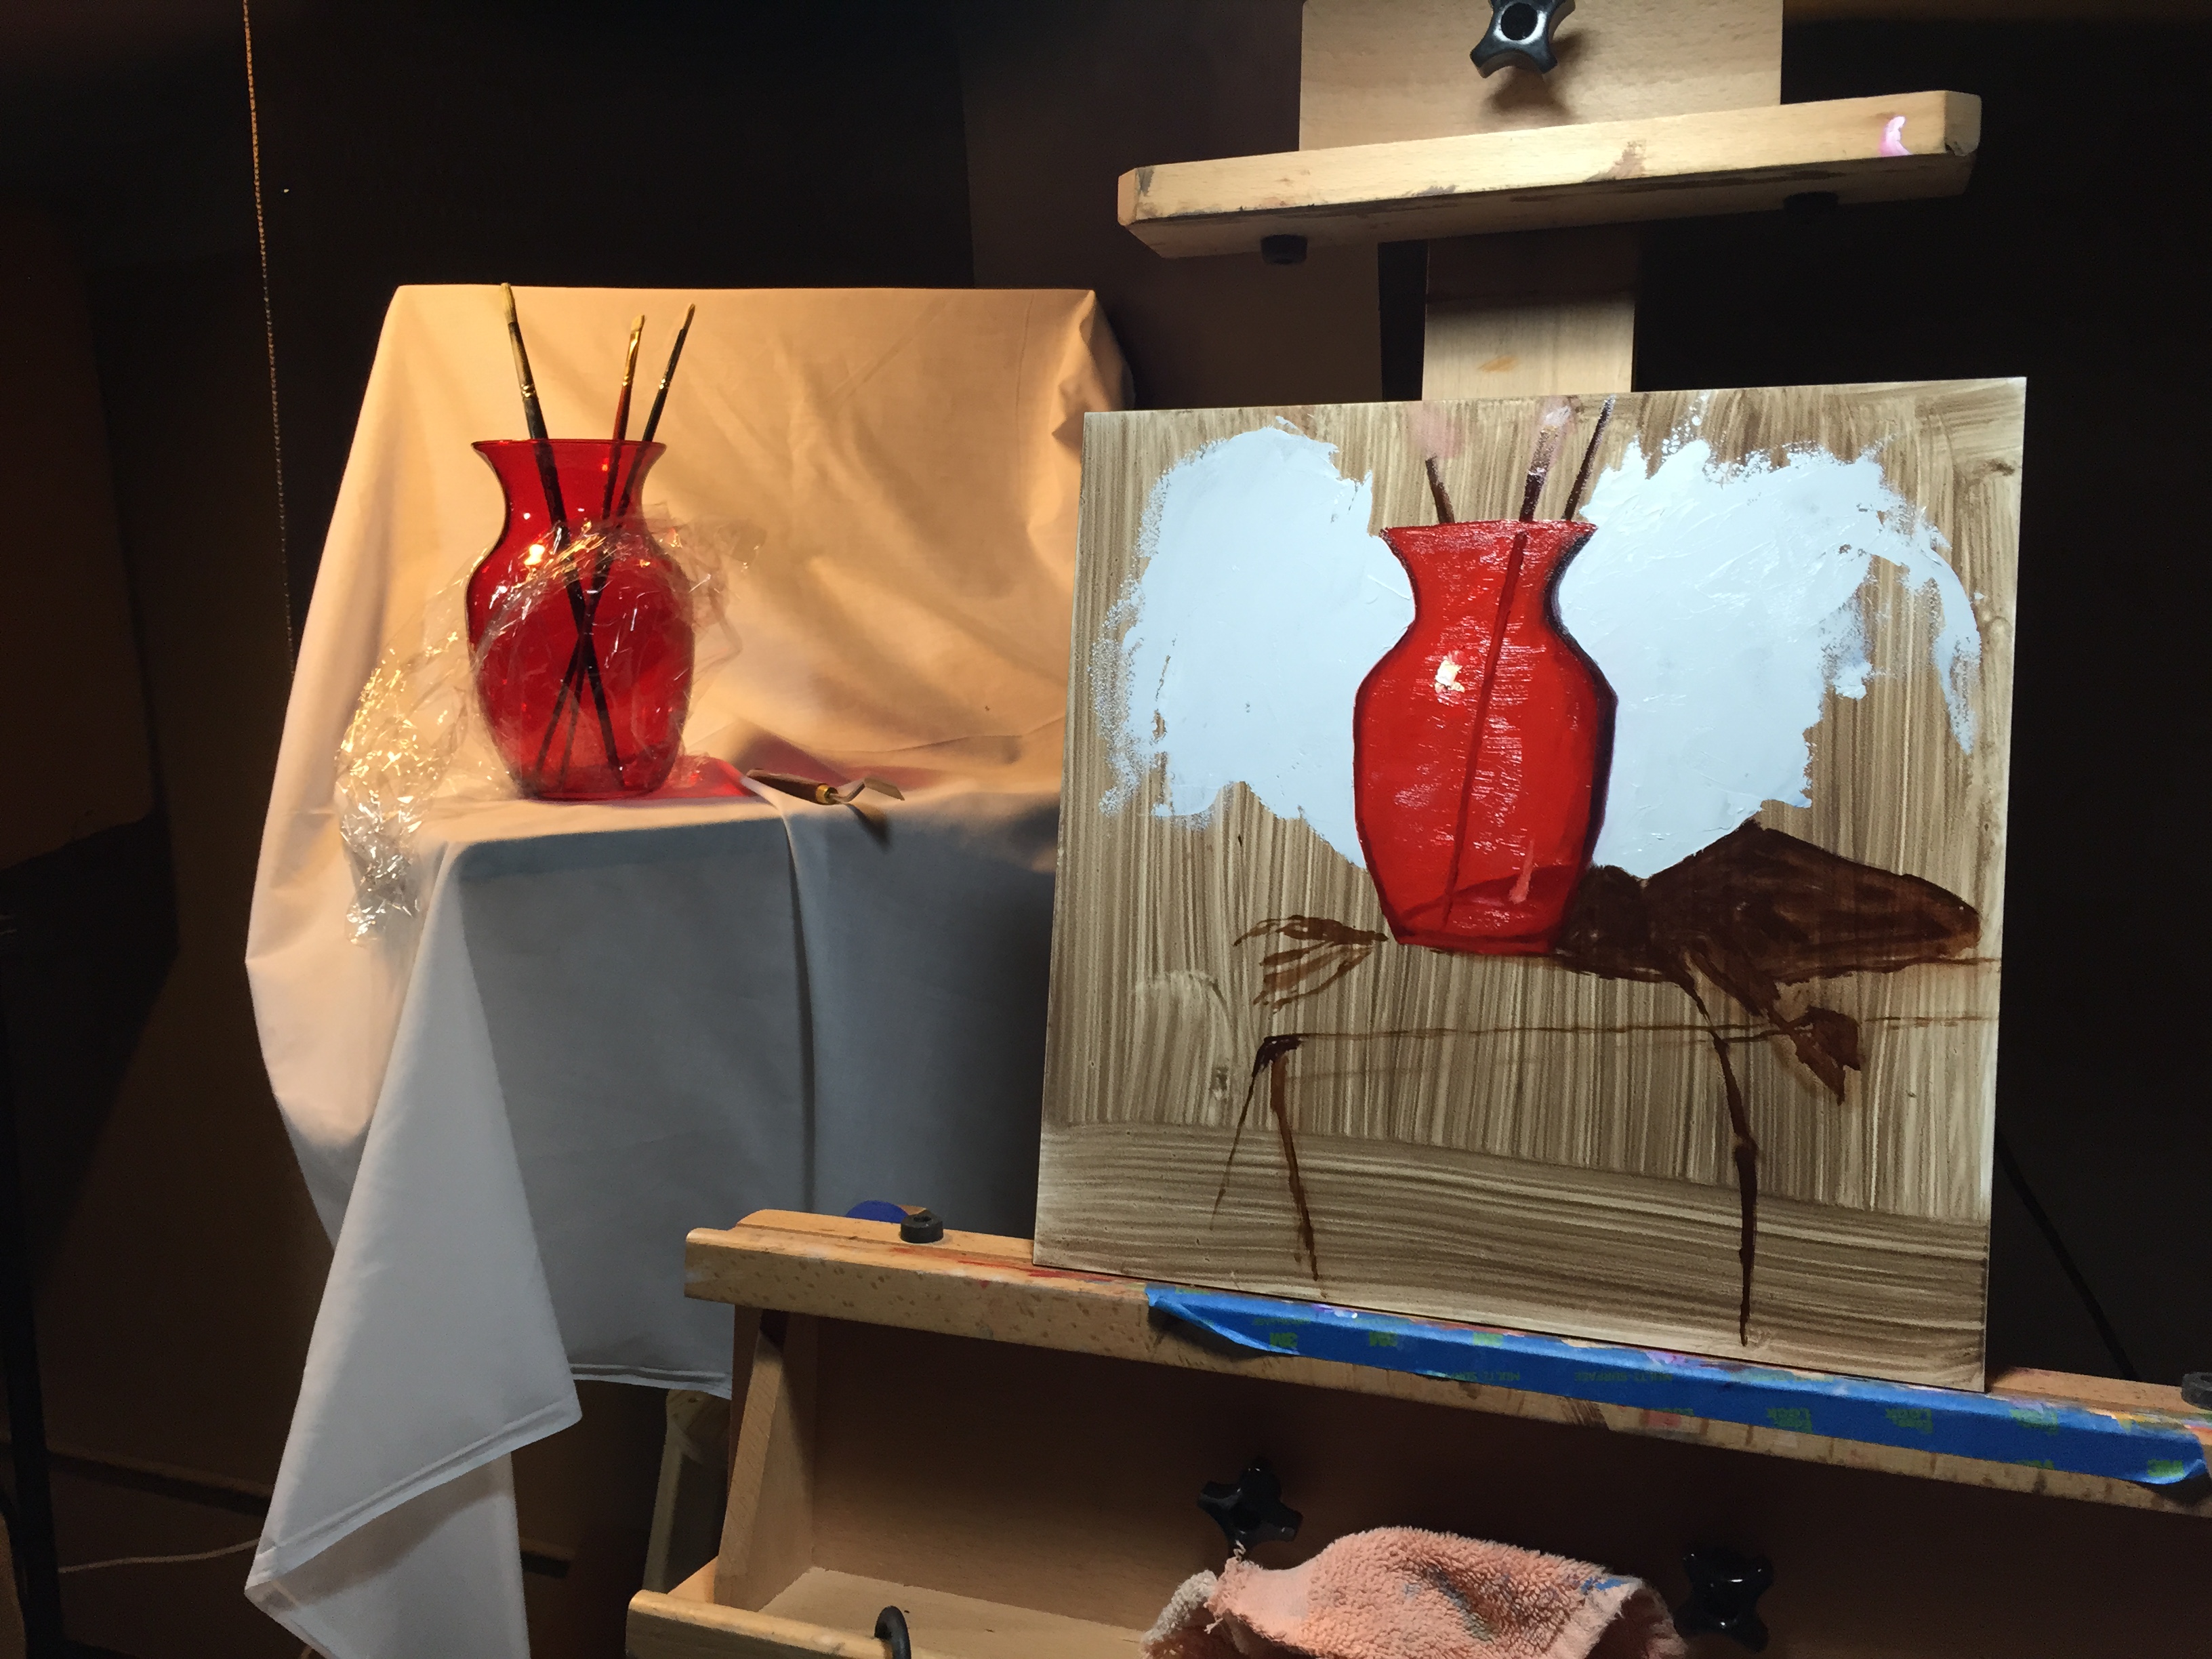
I’m probably just dodging the real challenge of wrapping my pretty vase in saran wrap, which essentially may ruin the piece, but at least I had the pleasure of completing my first white linen table cloth top and folds. Painting the palette knife (with a palette knife) was a little difficult with the gold/brass colors where the wood handle meets the metal neck, but it’s close enough given it’s not the focal point of the work. I also kept it a little soft so as to not draw too much of the composition’s attention. Also got some of the red of the vase in the cast shadow by simply working wet alizarin into the cast shadow darks – pure, dumb luck. Did all of this work with a palette knife, which is becoming an addictive tool.

Next session will tackle the cellophane challenge head-on. But for now I’m happy with the supporting cast.

IMG_3067

Red Vase and Cellophane – Update

With a few deep breaths, and some tasty wine for liquid courage, I dove into the cellophane stage of this composition. I carved out a little more than an hour tonight to get the ball rolling. I was pleasantly surprised with the progress, but I will admit that my inner artist was struggling with laying gray tones on top of the pretty red vase in the name of cellophane.

It was rough going initially b/c there weren’t enough value contrasts between the white table cloth and the wide range of cellophane grays and cast shadows. Then I remembered the advice from David Cheifetz during his workshop a couple weeks ago – “Value is king! A painting with the right values but wrong colors will still look pretty good.” I’m not about to put that on a tshirt or a bumper sticker, but its great guidance. I stepped away from what seemed like the right dark and light grays and made both ends of the spectrum more extreme, darker grays and lighter grays. It seems to have worked so far.

The real power of the cellophane image won’t really come together until the grays are laid in properly and then the bright, white highlights are added on top. That’s what gives the cellophane it’s shape and texture. I’m still not entirely convinced this will look like the real thing when I’m done, but stepping back from this first stab at it, I was able to see the shape of the cellophane starting to come together. The key is going to be establishing that clingy sensation with the highlights. Fingers crossed…

[The grays of the cellophane are primarily 2 setups: Ultramarine blue + burnt umber + white OR white + ivory black. I’ll probably add a 3rd option for the cooler side of the cellophane (right side, away from the light source) of UB+raw umber+white. ]

IMG_3064

Workshop Day 4 – winter storm cuts things short

Day 4 turned into a hurried 1/2 day due to the winter storm that blew in during the morning.  A couple of inches of sleet and icy roads forced me to head home around 12:30 before the roads south became impassable for the night. Good thing I did because the drive was very precarious for that first hour. But before I had to leave…

David spent another 90 minutes working on the cellophane objects, bringing the piece to its glorious completion. While it’s not as refined and polished as some of his other work of the same subject, it was still very impressive given the timeframe. It was very interesting to see the cellophane come to life, but he also spent a lot of time getting the drapes in the tablecloth just right, which was surprisingly fun to watch. Nothing in his composition is done half-ass; it’s all-in on every element.

IMG_3048
David’s completed cellophane objects. About 4 hours of effort. Amazing!

IMG_3050

I had a little time to work on my vase and cellophane composition before having to head out to avoid the worst of the winter storm. I was able to apply a lot of what I had learned, along with hands-on guidance from David during class, to get the painting in a good position for success. The vase is coming along nicely, and while I didn’t get to start on the cellophane elements, I’m excited to work on this project, very excited!


IMG_3041

I’ll definitely take another Cheifetz workshop next year. He’s an excellent teacher and a true master of his craft. It was also nice to meet so many skilled artists and friendly people during the workshop. It was a great group and there wasn’t an annoying person amongst the lot, which is saying something given there were 10 students. I can’t wait to get the painting knife back in my hands this weekend!