Happy Hour – Shaken

It’s happy hour time again! Before moving forward, it’s time to reveal the name of the cocktail from the Happy Hour – Roosevelt post from a few weeks ago… the Sazerac! It’s a great drink and the next time you’re in New Orleans I highly recommend a visit to The Roosevelt for the original recipe.

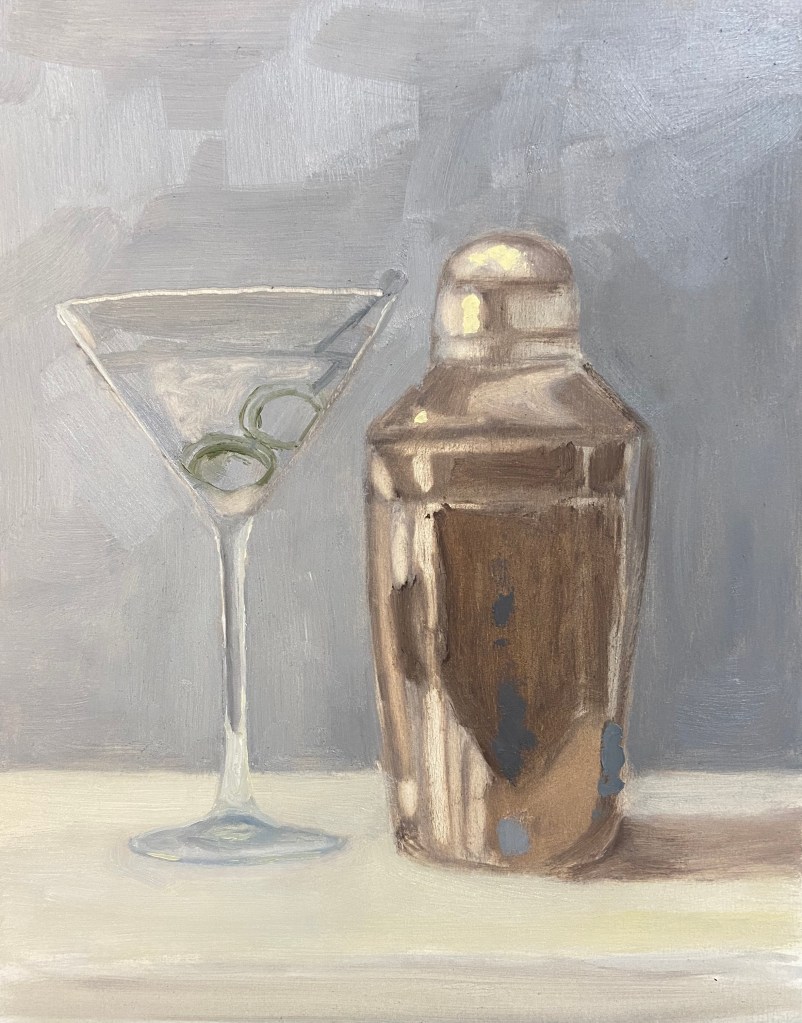
This latest addition to the series should be much easier for you to figure out, although it wasn’t necessarily easier to paint. Happy Hour – Shaken is an iconic cocktail indeed and something that James Bond fans will recognize instantly, although 007 preferred a stirred version.

This cocktail is a top choice in my household – even the dogs like it! Well, they probably would love it, but they just get to have the ice cubes after the drink has been strained. Yes, it’s hilarious – they hear the shaker, come running to the bar, and proceed to sit (without a command mind you) until I’m done, at which point they each get a piece of ice. They are, without a doubt, very lovable booze hounds.

Back to the painting…

I’m very happy with the outcome and feel like the repeated efforts on this Happy Hour series is starting to show demonstrable improvements in the artwork. This was a challenge on 2 fronts. First, the ongoing challenge of glassware in a still life has been tricky to refine, but I finally figured out the right value scheme to make it work – the solution for me was simply being more aggressive with the darker values. Secondly, I lacked experience painting truly reflective metal in still life compositions. Again, a more concerted approach with the darker values made a difference, but more importantly was simply waving the wand of artistic patience and working through the various reflected elements.

A few additional observations and details about the composition:

  • Reference Photo: As you can tell the shaker is not exactly the same as what’s in the photo. I used a reference photo blending technique, using the real shaker as my primary source, but simplifying the object by looking at other photos and paintings on-line that were, quite frankly, better cocktail shakers.
  • Brush and Knife: The vast majority of the piece is done with a Flat #4 and Round #2 brush, but the olives are all knife work. They are the focal point of the composition, and as such I wanted them to have some more texture and a reflective quality of their own.
  • Size: This is more than twice the size of previous Happy Hour series pieces, 8″x10″ vs 5″x7″ boards. Usually when I go bigger, the work is harder technically, but this time it seemed easier. Like I said, progress.

I haven’t figured out what the next cocktail in the series will be, but I’m leaning towards something with a shaker. Cheers!

Dances With Squirrels

Dances With Squirrels (study)
6″x8″, Oil on canvass paper
This simple study piece is done, although I invested more time in the composition than originally planned. I rarely do a study as a painting (if you’re not familiar with the term “study” in this context, here’s a short summary on Wikipedia here), opting for a drawing instead (which I had already done previously, as noted in the Meteors and Squirrels post last week), but my goal was to practice the brushwork needed to capture a dog in motion from a short distance. I also wasn’t sure how well this composition would translate to the canvass. I learned a lot in this exercise. 

First, I was surprised that the dog (Wolfgang) portion of the painting wasn’t very difficult, probably due in part to the various practice sketches done previously. The trick was to apply the darker parts of his coat last, which might technically be incorrect, but it was easier to manipulate the black shapes on his coat if it was the last step.
 
There are a number of compositional changes that will need to be made for the “real” piece:
  • The fence was both boring, distracting, and worst of all had many of the same values and hues of the trees and the dog, which made it hard to work into the layout effectively. I think the fence will be removed going forward. 
  • The trees were tricky from a color perspective. In real life, they’re a weird gray black, basically a color graveyard, so making them interesting took time. The other problem, which I haven’t yet solved, is ensuring their coloring isn’t too similar to the Wolfgang’s black and golden brown coat. 
  • ​The coloring of the grasses are fine, but the shadows will need more attention in a formal composition. They’re a real highlight of the work because they give a more comprehensive feel of the height and breadth of the tree tops, which are out of the frame.
  • Last but not least, that pesky squirrel. I was so focused on how to paint the dog that I hadn’t given any thought to the squirrel. Have you tried to paint a squirrel? The good news is that my lack of practice painting rodents might have worked to the benefit of the composition because the squirrel is very hard to see against the light blue sky background, so the viewer has to follow the gaze of the dog to find the squirrel. And there’s our compositional intrigue!
I’m going to wait a few weeks before firing up an actual painting based on this study, but I think it’ll be an eye catching, tall, narrow canvass layout that should be fun to create.
Thanks for visiting! ​

Happy Hour – The Roosevelt

Happy Hour – The Roosevelt
Oil on board, 8″x6″
We’re returning to the still life series called Happy Hour. Cocktail #2 is hot off the easel and ready for your guesses. But first, time to reveal the answer to cocktail #1 from Happy Hour – Angostura… it was a Whiskey Old Fashioned! The Old Fashioned is one of the classic cocktails, but despite the simplicity of it’s composition, there are a number of subtle changes one can make in the base ingredients to create a wide range of variants. A very good recipe can be found here on PUNCH, my go to resource for all things cocktail. If you have a favorite riff on the Old Fashioned, please share in the comments!
Returning to Happy Hour – Roosevelt, the hints are few but specific. I excluded the city name from the napkin, but suffice to say it’s arguably the most important cocktail (and food) city in North America (although I defer to our Canadian readers for any challenges to this claim), birthplace of many classic libations. Any guesses? The answer will be revealed in the next cocktail series piece in a couple weeks.
The Roosevelt is another oil composition on an 8″x6″ gesso board. The type of cocktail glass is not something I would have tackled at this point, as it’s very complex and a bit beyond my comfort zone, but it was true to the cocktail, so I gave it a go. The other challenge was the color of the drink itself, a mix of cadmium red medium, cadmium yellow deep, titanium white and ultramarine blue; there are also some bits with cadmium yellow.
Next time I’ll pay more attention to the dark values in the drink itself, as I strayed from that tenet early on, getting a bit obsessed with trying to nail down the elusive pink/orange color of the drink. If you look at the block-in picture, it’s obvious that I knew there were very dark values in the drink itself, but I didn’t paint them in properly.
And beware the challenge of painting words, especially words with fancy letters… with lots of curves… on an undulating cocktail napkin! Definitely not something to do if you’re jacked up on caffeine – it requires a steady hand and a lot of patience. I had to make a big withdrawal from my limited Bank of Zen to get through it.
I was pleasantly surprised with the ease of doing the blurry, colored bar of illuminated bottles in the background. This is also true to the actual setting of The Roosevelt and a handy approach to call upon in future compositions.
Thanks for visiting and don’t forget to post your critiques and cocktail guesses in the comments!

“Framecro” – Fast Framing on the Cheap!

Framing artwork used to be a dreaded task, but over the years I’ve come to really enjoy it. This is especially true as we start 2020 because I recently had 4 dog related pieces accepted to an Austin art show at Art for the People gallery called Celebrities – Pet & People Portraits. Future posts this week will provide more details about the show and the inspiration behind the pieces, but I wanted to share some creative custom framing ideas I used with 2 of the pieces in the show.
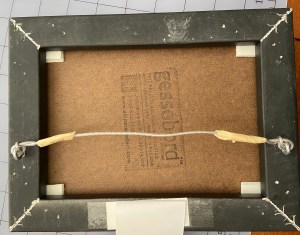
One of the troubling issues with framing is the commitment, secondarily the cost and complexity. The process of “properly” framing a painting often involves sealing it inside a frame in a way that makes getting it out an ordeal. When I hang finished art in my home, I can easily get bored of the frame after a year, or simply want to change the art that’s in the frame. To solve this problem, I came up with a Velcro based solution that works great with small pieces in floater frames, whereby you affix the piece with Velcro instead of glue or some other fixative, which allows you to swap out pieces in the same frame. This is handy for your personal art at home, gallery shows or events.
The steps to frame using Velcro, a process I’ve trademarked as “framecro“, are very simple, fast, and inexpensive. Let me know if you opt to framecro any of your paintings; improvements to the process are always welcome.
  1. Most Velcro types will work, but the Command line of snap-type from 3M is what I prefer. They market it as a picture hanging velcro because it snaps together very tightly, but you can still pull it apart easily.
  2. Cut 4 twin sets of velcro rectangles, which means you have 8 total rectangles of Velcro. These should be relatively small and easily fit into the 4 corners of the frame.
  3. Affix the velcro to the corners of the frame and the corners of the back of the artwork.
  4. Align the artwork and press it onto the frame.

You’re done! If you want to swap out a piece, just pop out the existing piece of art and press in a new one that has Velcro in it’s corners.