Drawing – Dog Curled on Bed

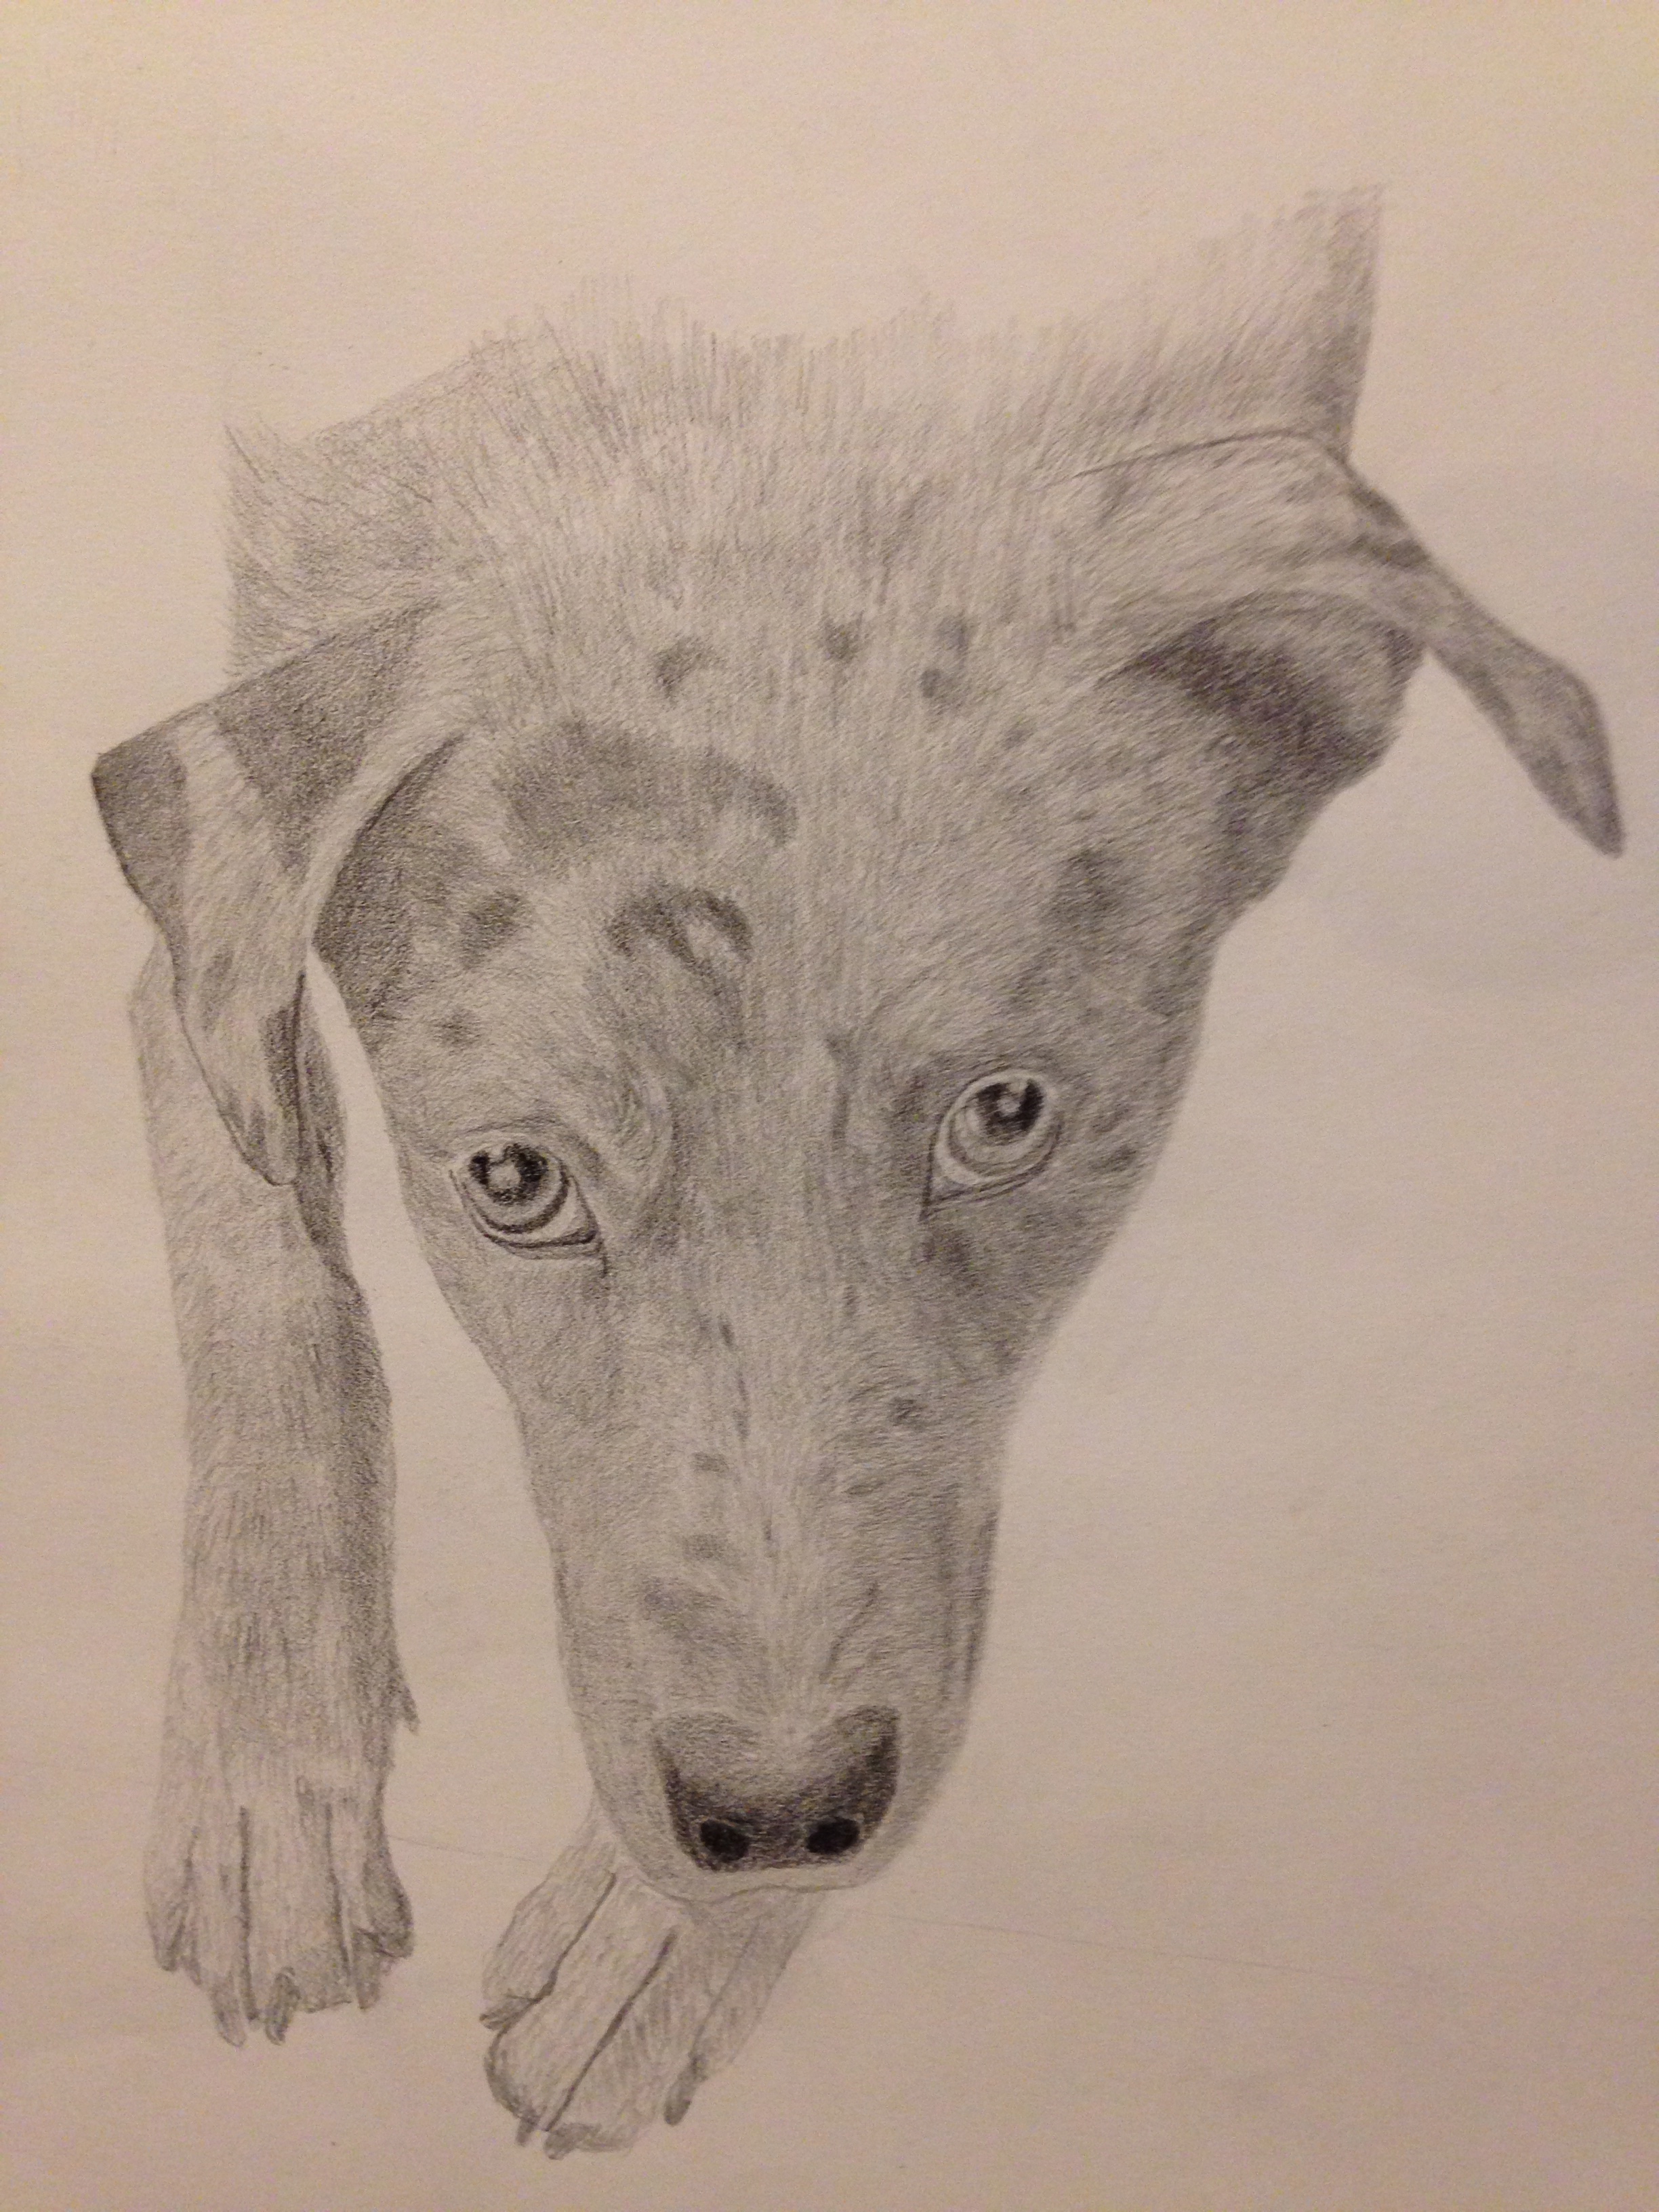
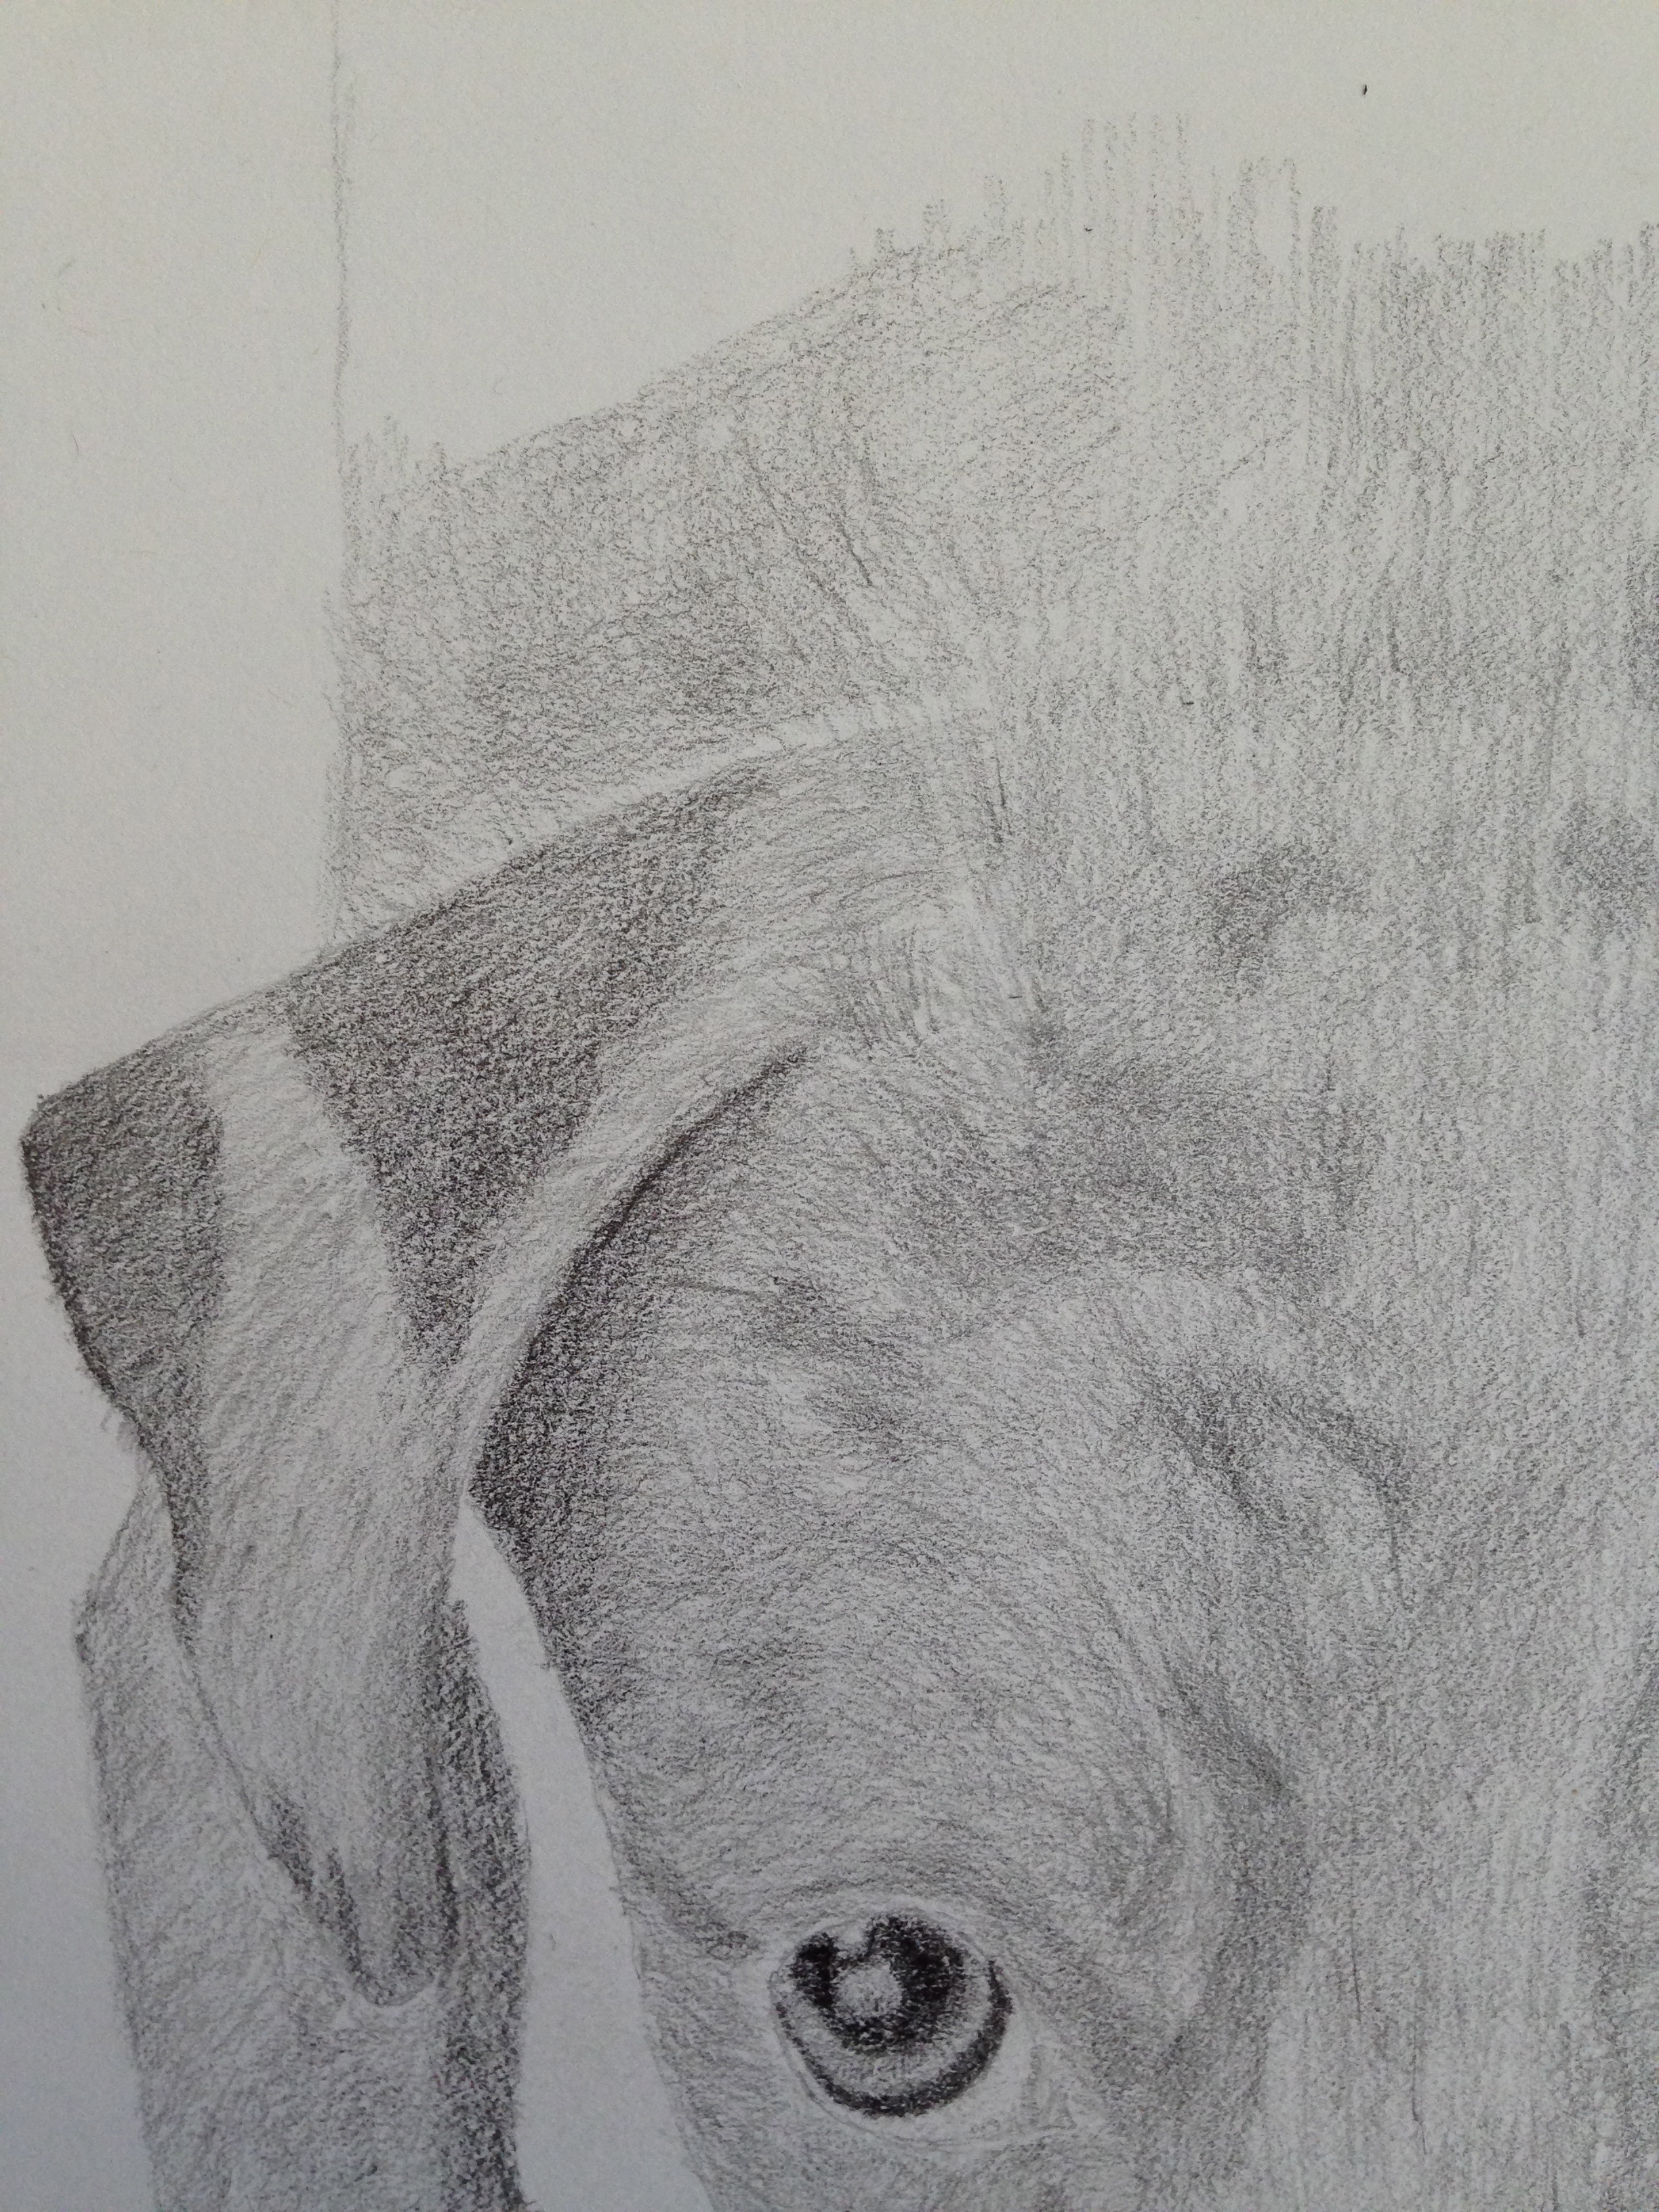
With a close-up of a dog face under my belt, it was time to tackle a different perspective. This is my mom’s dog, Dixie, in full dream mode. She’s very camera shy, so this is as good as reference photos get for her.


First session lasted a couple of hours, but only after having done an initial reference sketch, which helped get the difficult curled up shape and proportions of body parts just so. Once I had this much done I had to give my arm a break. All those hairs start to drive you nuts. Pretty good start, but a little creepy since she’s floating on the page. Dixie Drawing Lg Another session, probably 90 minutes, got the obvious dog bed in place, but also worked the ebony pencil to get the values right on the folds of Dixie’s coat. Dixie Drawing Finished

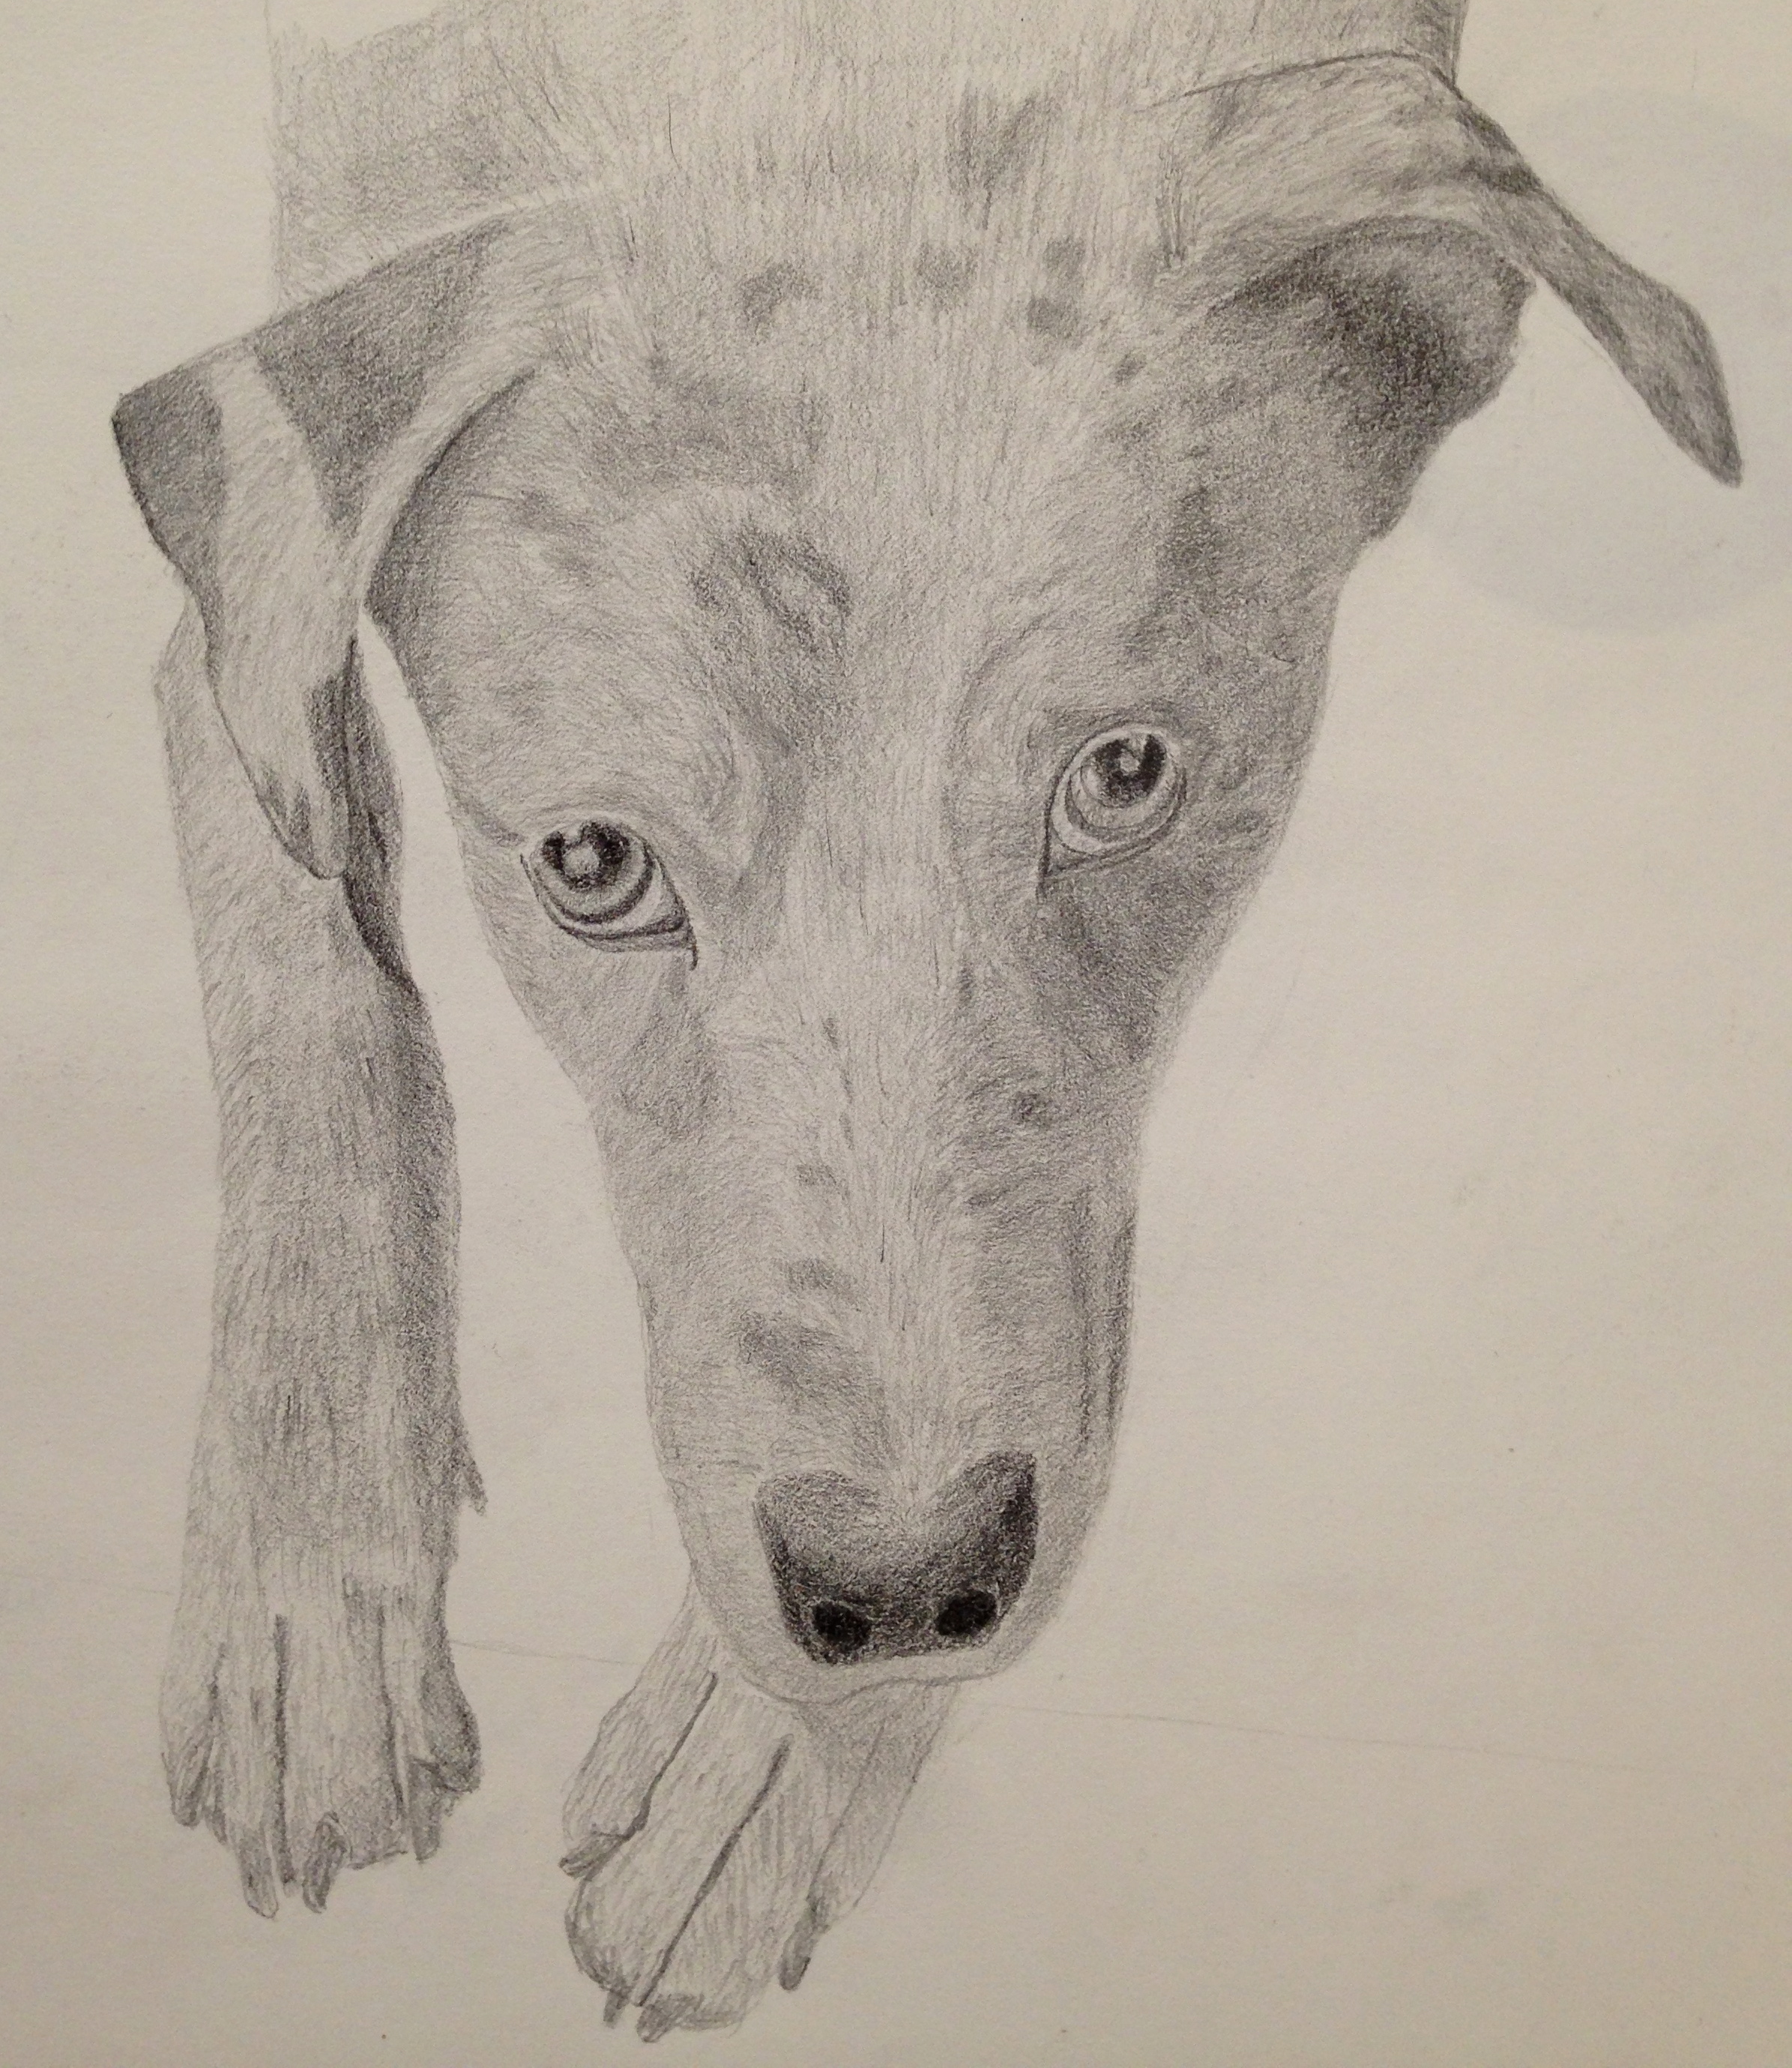
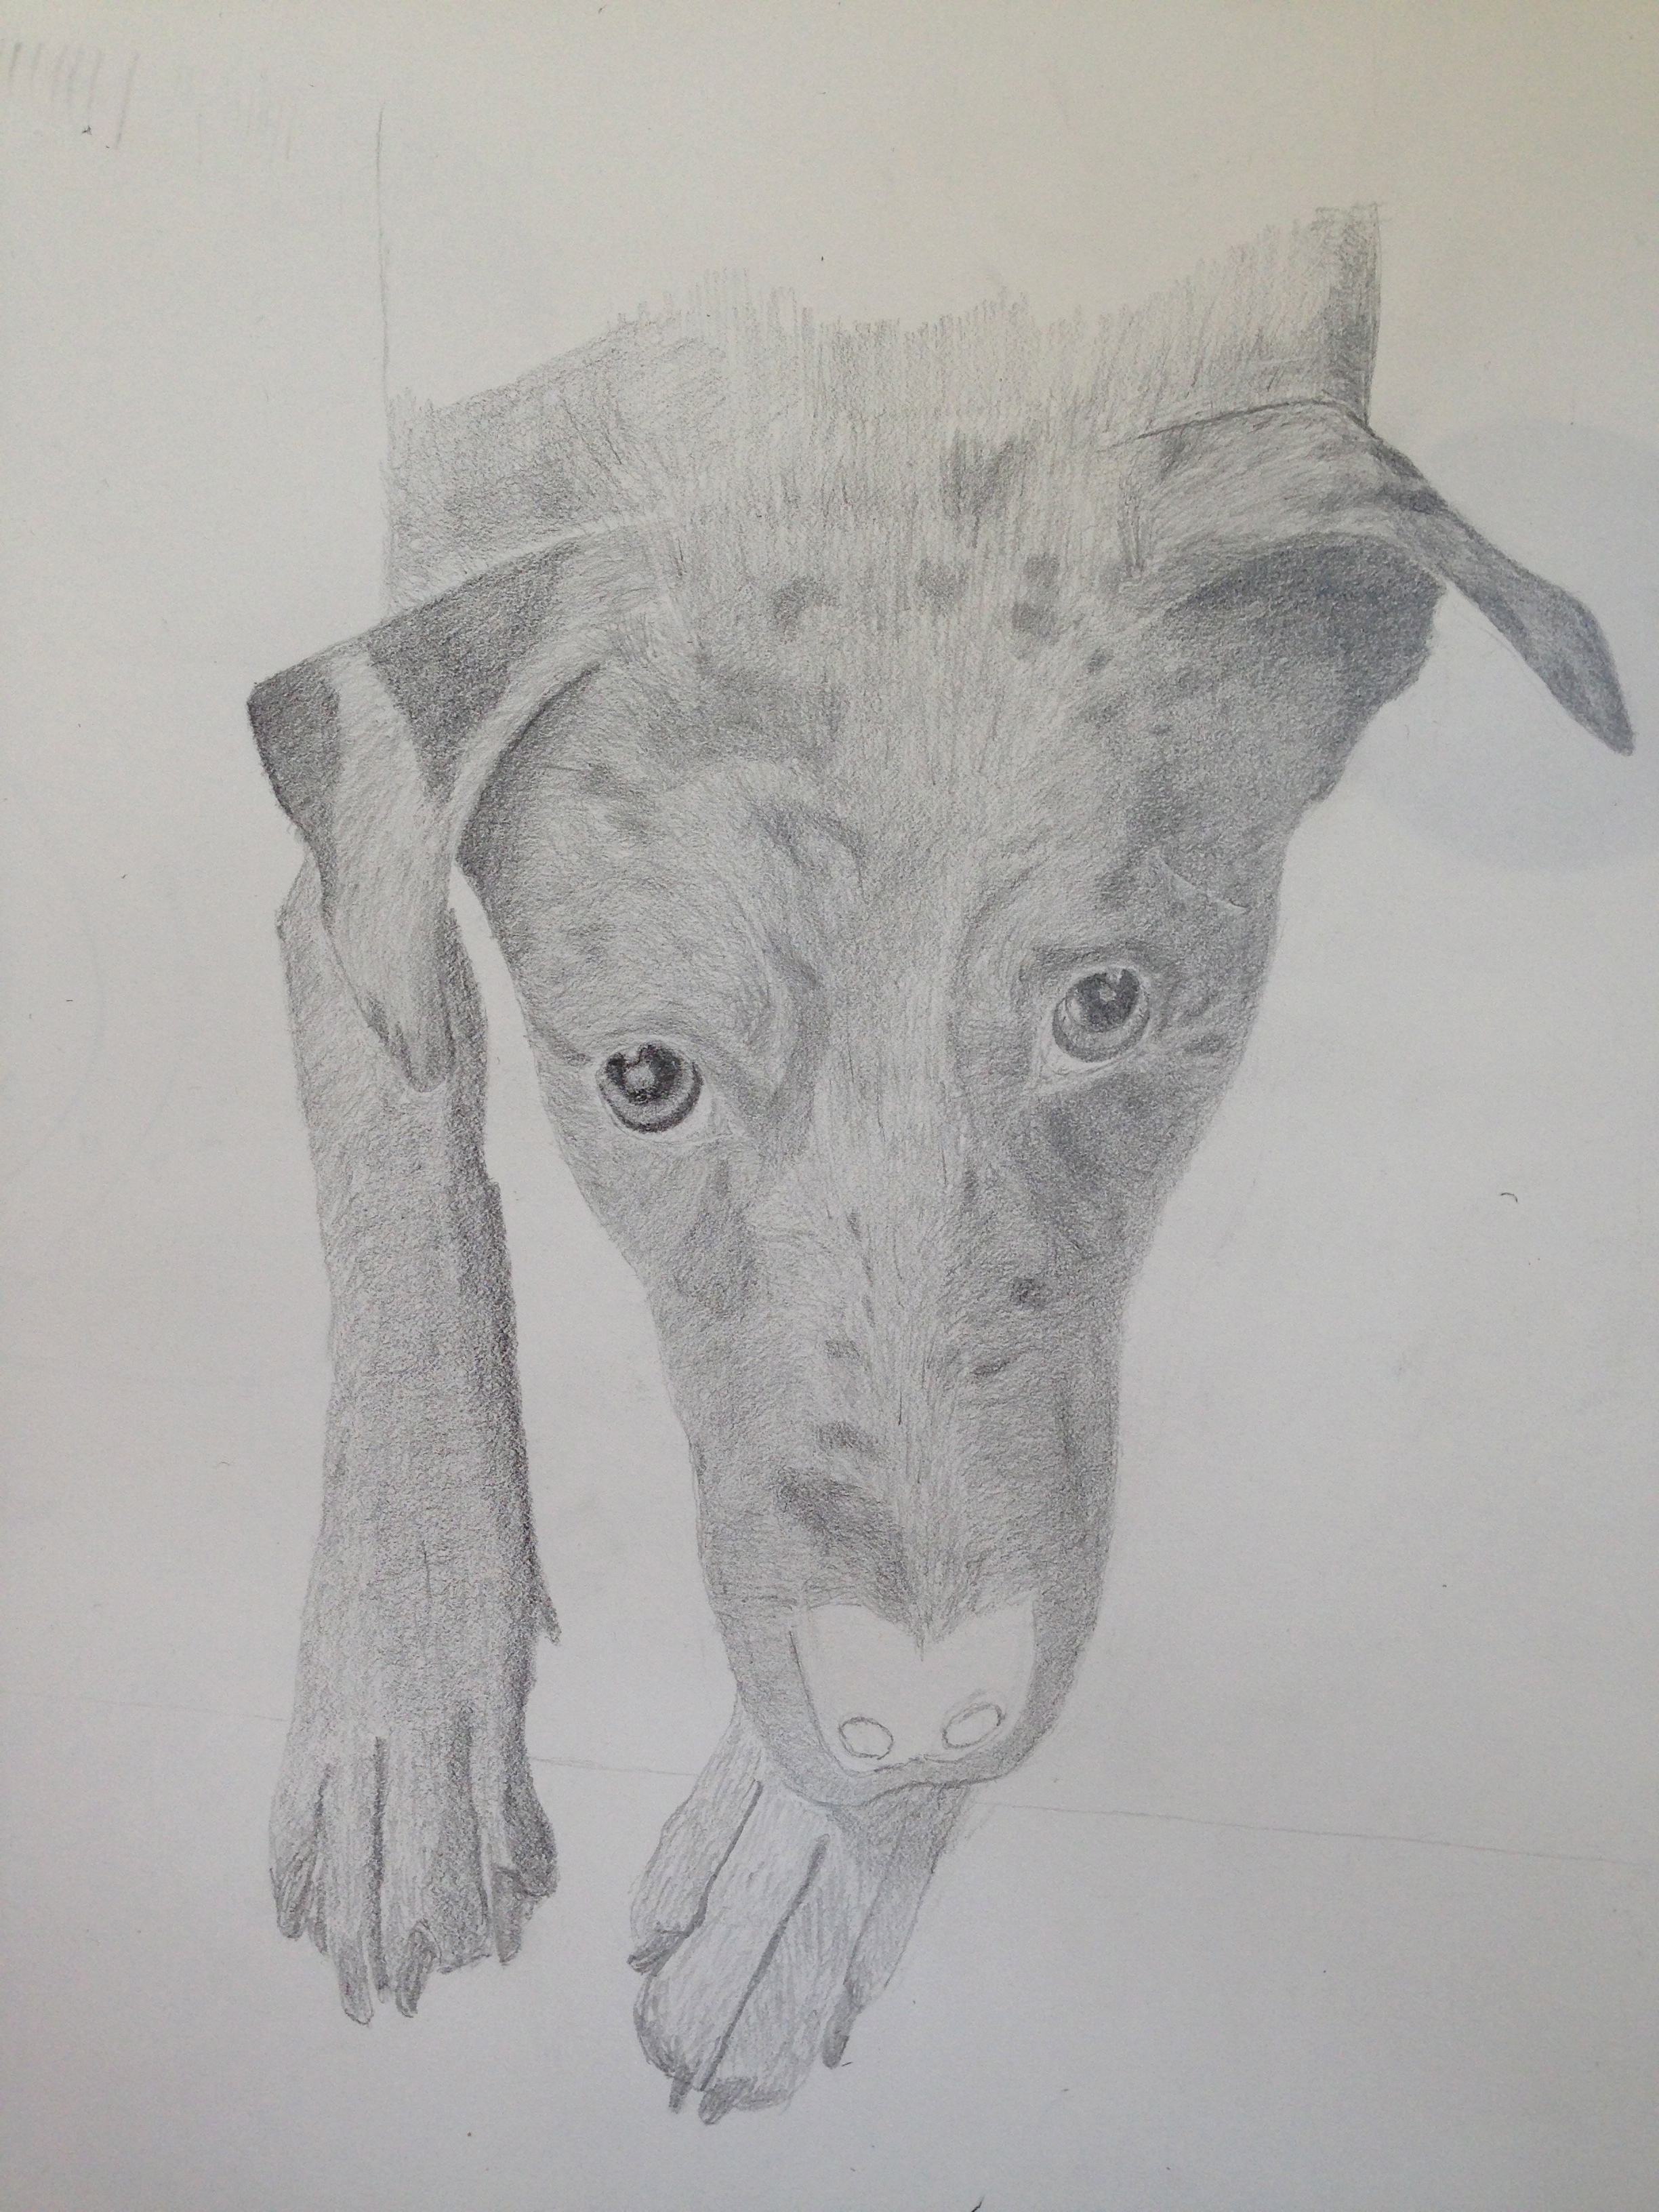
Pretty happy with the final composition. I’m genuinely surprised at how quickly this came together. There were 3 big challenges with this drawing.

1. The face and general complexity of dog parts involved in a curled canine. But the reference photo was really washed out for the face, so I had to draw what I knew was there rather than just what I saw, b/c I knew what I was looking at was wrong.

2. The hair is much different compared to my previous effort with Zip’s dog face. The strokes are longer and thinner. It was also very tricky to get the white dotted pattern and random splotches in some places just right. Used a 2B for most of the hairs, but in some spots experimented with an HB.

3. The values on a curled up dog SUCK! I’d love to blame it on the lighting in the photo, but even if the lighting was studio quality, I’m pretty sure the challenge of gradating values to show the change in depth in the curled center area would be the same. But I got it to a good point and decided I better leave it alone.

Overall very happy with this one. I’ll have to do a similar composition of my dogs curled on their beds.

San Francisco and Golden Gate Diptych

Long overdue for a post. Been working a lot on drawings (animals), finishing the Lines & Blossoms piece, and started this new diptych.

Reference photo was taken by me a couple years ago. It’s an amazing vantage point from the Marin headlands looking back towards the city. Breathtaking!

SF and Golden Gate reference photo

This is my first true diptych, as well as my first painting on wood. The panels are small (5″x7″) and pre-treated. Below is the rough drawing outline, which I had practiced in my sketch book a couple times prior. What worked best for me, which wasn’t the way I first tried to do it, was to draw from the horizon/back of the composition “forward” to the bridge and foreground. It was much, much easier to get the angle and proportion of the GG bridge with the city roughed into the background for reference points.

rough drawing to get scale on panels

This first session was short by my standards, perhaps a couple of hours. It moved quickly because of the small size and the color mixes came together faster than usual. The details will come in the next session, but I think getting the lighting on the cityscape is going to be tricky but critical to ensure the piece has the right depth.

IMG_2813

Drawing – Vine Tomatoes Part 1

So at first, I was intimidated, and a little concerned that I had angered my drawing teacher, Laurie, because she recently told me to draw this…

IMG_0167

What the hell! Tomatoes, lots of them, with the vines attached. As the sweat began to bead on my forehead, she showed me in her Mr Miyagi way that to draw a a batch of vine wrapped tomatoes, I simply had to combine all my past lessons of what seemed like an endless array of geometric shapes – spheres, cones, cylinders – into one drawing. I guess she was right because in short order I came up with this…

IMG_2809

I’m pleasantly surprised with the results and actually look forward to working in the rest of the tomatoes, well, most of them. Whoda thunk that drawing fruit could be so fun.

Lines & Blossoms – Update

This continues to be a rewarding effort, despite the learning curve. Updates from last post include adding details to the tree blossoms, tree trunk texture, improvements to the door to the right of the tree, and some small line detailing in the buildings.

IMG_2806

Still need to figure out how to get the cherry blossoms to look more realistic, while figuring out how to transition the values in the tree to give it a sense of volume. While I love the colors thus far, the result is still flat and lacking depth. It’ll get there, but I haven’t figured out how just yet.

“Play with me?” done

So it may not look like much was done between the last post of Zip’s face, which I’ve decided to call “Play with me?”, but I spent a couple of short sessions trying to get the shading just right so the composition has more depth. I think I’ve taken it as far as I can and ready to move on, although my drawing instructor (Laurie) may have something else to say about that, but I’m really happy with it for my first real effort at a dog face drawing. Now I have 2 other dogs who are jealous and ready for their turn in the studio.

IMG_2804

For those interested in the technical details:

  • Used 3 pencils in the composition – 2B, HB, and an ebony
  • Strathmore drawing paper, 14×17, but used about 75% of the page
  • Not sure how much total time, but best guess is probably 6 hours
  • Reference photo of Zip was taken indoors, light source was a table lamp in upper left corner
  • Zip is a 2 year old rescue mutt, Aussie Catahoula mix; she’s ball obsessed and the biggest personality on 4 legs I’ve ever met

Lines & Blossoms – Impasto Strikes!

Spent a couple of sessions working through the latest challenges with this fun, albeit difficult composition.

Since the last update, a number of things have been tackled, some more than once.

First, the focus remained on the buildings and supporting cast of what will be the cherry blossom tree. This set of sessions updated a number of touchup items, but the primary focus was a) laying in the window woodwork, and b) getting the base layer of the tree on the canvas. It turns out I don’t have a great brush for the type of detail work on the window frames, but I made do with what was available. Adding narrow detail brush to my supply list, but anyone with specific brand/type suggestions is welcome to make comments with the details.

IMG_2799

Next session worked on elements of the composition and the next stage of the tree, including some experimentation with impasto effects.

The most significant update aside from the tree was the addition of a sidewalk (thank you Nina), which added missing structure to the bottom of the work, and gave more strength to the 3-point perspective I was working towards. It’s also going to be a critical part of the composition because it plays an important part in leading the viewer into the painting, whereby there is a clear break in the curb of the sidewalk that leads one into the stairway of the main doorway. The framing of the cherry blossom will enhance this effect.

The impasto on the tree are hard to see in the photo, but believe me they’re there. I dove into my first true impasto medium experience, mixing conservative amounts into the purples and pinks. Its very addictive, especially after having spent hours working on very exacting lines and angles of the homes, then being able to run wild with an array of brushes and styles in exploring how best to represent the beauty of the tree blossoms.

Some other minor updates were made in this session, but things are close to completion. Still need to work a significant layer on the cherry blossom, ensuring there is the right balance of light pinks and whites on the right side of the tree, whereas the values on the left are in shadow and more subdued and less saturated. Furthermore, the black door down the street needs work, as well as some updates to the window panes and their reflections of the sky on this particularly sunny day.

IMG_0165

Zip Drawing update

Thanks to some very helpful guidance from my drawing instructor, I learned how to draw the nose and “presto!”, Zip has a complete face! The nose was done with an ebony pencil and the key was getting the values right by working over the area repeatedly. Finally, the paper texture was helpful in giving the nose that dotted/pitted look of a dog sniffer. Never saw that coming, but apparently it’s a reliable trick.

Worked some more shading on the darker side of the face and the paws. I’m guessing one more session should finish this up.

IMG_2797

Drawing update – Zip

Actually getting close to finishing this one. Got coverage of the entire face except the nose. Worked on the values – focused on lighter values on the left side and darker shadows to the right. Not sure what to do with the nose, so going to hold off until my next lesson with Laurie in a few weeks. There must be some magic to get the unique texture of the nose, so that’s going to hold me back for the short term. Pretty happy with the rest of it, though. Included a couple of close ups for a better look.

IMG_2783 IMG_2782 IMG_2781

Lines and Blossoms Update

Made some more progress tonight. Got the yellow house laid in, the stairs to the blue house entry, and the last couple windows. Next up are the window frames, which should make the houses look much more finished, and fill in the little pocket of sky in the upper right corner to get the canvas covered before tackling the cherry blossom focal point. Really interested to see how this changes the composition once the tree is added, in large part because it will cover a large swath of canvass and really change the balance of the piece. It will either be a massive improvement or an epic failure. IMG_2777Stay tuned…

San Francisco Lines & Blossoms

Started a new project this week. Missing San Francisco lately, a second home of sorts, so pulled out some of the photos from one of the summer trips for inspiration. This one is going to be a composition about contrasts, not just in values on the houses from an intensely bright summer sun, but also between the crisp, clean orderly lines of the buildings as the backdrop for a cherry blossom in full bloom explosion. Hoping to work in some fabulous thick paint for the tree, but we’ll see how that goes. Gonna need some help from my painting teacher before this one is done.

Reference photo

IMG_1485

Session 1

IMG_2776