1 Hour Challenge – Run Sandpiper, Run

Moving these updates to the blog to motivate myself to do them more frequently. The goal is to hone my drawing skills by doing sketches in 1 hour.

This session is from a reference photo taken by my brother. Very challenging given the need to incorporate movement of the bird and the advancing waves. Oh, and drawing ocean foam is hard as hell. I think the key is to not draw it. 

Yosemite – El Capitan

Started a new project this week, El Capitan in Yosemite National Park. This is a massive wall of rock that is a marvel to see in person. I haven’t been able to find them on the photo, but there are a number of climbers on the wall. If I hadn’t taken the picture myself I wouldn’t believe it either.

This composition is actually a study to get some key aspects of the hues and values figured out prior to doing a much larger piece. This particular effort is being done on a 12×18 canvass board, all oils, using palette knife only.

Figuring out the variations of grays, both sunlit and shaded, is proving to be an enjoyable challenge. This is a great way to really learn the subtleties of warm and cool grays.

Another session or two and this preliminary piece should be done. Still need to get the right half of the shadow area done, but it’s moving along at a faster clip now that the value scale has finally been figured out. There’s more paint on this piece than I’d like to admit.


Heceta Head Lighthouse

This was a fun one! This is Heceta Head Lighthouse on the Oregon Coast. Breathtaking coastline and this area is particularly rugged and beautiful. One day I’ll replicate this painting en plein air, but for this iteration I had to use a reference photo. At least the photo was taken by myself, so I had a sense for the place; hoping some of that personal experience made it into the final work.

This piece is on 12″x18″ gesso panel and took about 8 hours to complete. While I still have a couple of minor highlights to add, this is close enough to the final product to call it done. I have never painted ocean, so the waves were a challenge, but I’ve started taking some lessons with a new instructor for a few hours every other week, and she was a tremendous guide when I ran into problems. If you like landscapes, check out her work at Mary Watkins Fine Art.

The palette is what I’m most excited about with this piece. While there’s a lot of (for me) technical skills that come into play with the water/waves/rocks, it’s the hues that I’m most excited about. Mary was very instrumental in teaching me about landscape warming and cooling using hues I hadn’t considered. Previously I had thought in terms of strict color wheel compliments to adjust saturation, but I learned how to think through the balance of what makes up colors that trend towards one end of the spectrum or another. For example, the use of Lemon Yellow, Cad Yellow Medium, or Yellow Ochre was actually a critical decision for this entire piece. Can you guess the winner and why?

Reference photo and progression timeline below. Enjoy!


Lamar Bridge into Austin

Getting close to finishing this Austin urban landscape piece. The view is from the south across the river towards downtown. The city has grown a lot since this photo was taken, so those familiar with the area might wonder why I excluded some buildings; not the case, they just weren’t there a few years ago.

Oil on gesso board, mostly brush work, done in studio with photo reference (included below). The bridge was tricky, despite having done a couple of practice drawings. It’s been an exercise in patience, having to redo various parts, but it’s been a great “learner” piece, specifically with the sky and water. I’ve started taking some formal art lessons every other week, and my teacher gave some great guidance with the sky and the water reflections. Confidence with these elements is 10x what it was a month ago. Not sure if it comes through in the photos, but the colors are rich, probably a tad too saturated, but the values and reflections are solid enough to carry the composition.

The bridge needs some tweaks to the facade so it’s not so flat, the addition of cars on the road, and a few street lights. At that point I’ll call it done. One more short session should do the trick. I’ll post the final product this coming weekend.


Diving Whale Tail

Stuck with the whale theme for this next project. This is a diving whale based loosely on a reference photo I found on-line. Also bought some Payne’s Gray to work on a more balanced value gradation on this piece that is dominated by the tail.

I think this is pretty close to done, but I don’t like the matte finish, so I’m going to do a final glaze layer in hopes of giving the entire piece a wet look.

This is a diptych, each panel measures 9″ x 12″. I was pretty specific with the panel choice so as to get good proportions for the tail. In fact, I think the painting looks better than it really is b/c of the diptych layout. Curious what others think, too.

Technical Details:

  • 2 gesso panel boards, 9″x12″ each
  • Brushes – 2 flats (sizes 2 and 4), 1 round (size 4)
  • Tail palette – Payne’s Gray, Titanium White, and variations of Black and Ultramarine Blue
  • Ocean – Ultramarine Blue + variations of Pthalo Blue, Pthalo Green, and Titanium White.
  • Water dripping off tail – Titanium White + Naples Yellow + Paynes Gray + Ultramarine Blue
Quick practice sketch.
Rough in with diptych composition.
Ocean with initial tail shadow.
Tail almost done
Tail almost done
Water running off tail and updates to ocean near tail with ripples.

French Countryside – Practice Study Done

Got back to the first painting study of the French Countryside (Loire Valley) landscape. Been awhile since I had worked on this one, but past post for reference here.

I liked how this came out, and ended up investing more time than originally planned. I definitely learned a lot about how I will change the composition when I do the “real” thing on a larger canvass (as opposed to this paper session), but enjoyed working in a  lose style and worked very hard on not sweating the details.

IMG_3669

I was pleased with a number of things:

  • Good balance of greens. The photo doesn’t show it very well, but the range of values also gives texture that I didn’t intend initially, but you can bet I won’t forget how it came together.
  • Dark rain clouds in the far distance have the right effect of coming storm.
  • Rose bushes, a complete improvisation, came out really well, especially given the speed at which they were done, ~ 15 minutes. I also find the red on green background works well to make them pop a little, giving them a good foreground effect to draw the viewer into the painting.
  • The fence line, meant to be wire strung along old wooden posts, can be painted better in a future composition, but I’m happy with how the variation in direction of the fence gives the sense of an undulating field. Also meant to direct the eye along the fence, across the field, and into the village and beyond. Not sure if that’s actually happening for viewers, but happy to be told I’m way off base here.
  • Trees have good depth and capture the direction of the sunlight well.
  • Clothes line, another improvisation, serves it’s primary purpose of giving a sense of wind from the approaching storm, as well as a nice focal point in the center of the composition.

What to do differently next time:

  • The village buildings are not well done. I wanted them to be muted, but I lost focus on them too much and the value variations between them are junk. For me, there are buildings further back in reality that appear to be too far forward. I also don’t like the roofs, which need to have a wider range of colors.
  • The green field in the distance is too saturated and a little too light. Need to push that back a little next time.
  • The clothes line is good, but can be improved. Wanted to add a person pulling down the clothes, but quickly learned that I don’t have that skill yet.
  • The clouds are awful. Need to practice in some other sessions, but globbed on paint too thickly and focused too much on the cloud shapes.

“Baleine!” c’est fini

This piece came together very quickly. Pretty happy with the end result. No brush work – all knife, so I pushed myself to develop more expertise with this tool. There were a few trying moments to get edges right, but it really opened my eyes to the nuances of manipulating the paint once it’s on the board.

The iPhone photos don’t capture the textural knife effects, but hopefully you get the idea of the progressive development in the time sequence below.

IMG_3652
Light pencil sketch as outline.
IMG_3660
Session 2 gets the initial values, sky, and some experimentation with the ocean colors.
IMG_3661
Session 3 made big strides. Figured out the right balance of ocean colors – blues and greens. Whale tail has initial form, but needs work – too flat.
IMG_0329
Session 4, lots of work to get the tail coloring and values right. Also figured out the water light reflection onto the bottom of the tail. Finally committed to having really tumultuous water, so added white caps and spray. Pure guesswork… no idea what I’m doing at this point. The painting knife and I were not on speaking terms for a brief span of time.
IMG_3667
Finished! Added touch ups in various places, but most notably updated the values on the horizon part of the ocean – it was too dark and contiguous, so broke it up with some white caps and lighter blue mixes.

“Baleine!”

IMG_3653

Started another piece called “Baleine!”. This is a humpback whale diving. Going to do this as a knife painting to get some texture that will reflect light and give the sense of water/wet on the whale. This is a small gesso board, which works well for knife work.

The palette is pretty straight forward, but the water will be a little tricky, largely b/c I’m a water moron. But it will be a good exercise. The whale tail itself should move quickly, as the tricky part is the initial dimensions and shape, which I spent some time already working through before putting gone the board to paint.

I roughed in the sky as part of this first session, thinking I just wanted to get the right value on the board so the contrast with the tail would work. But it turns out that the “rough” in is pretty good and likely I’ll just keep it as is.

“Rescued” – molds and molds and molds

IMG_3641

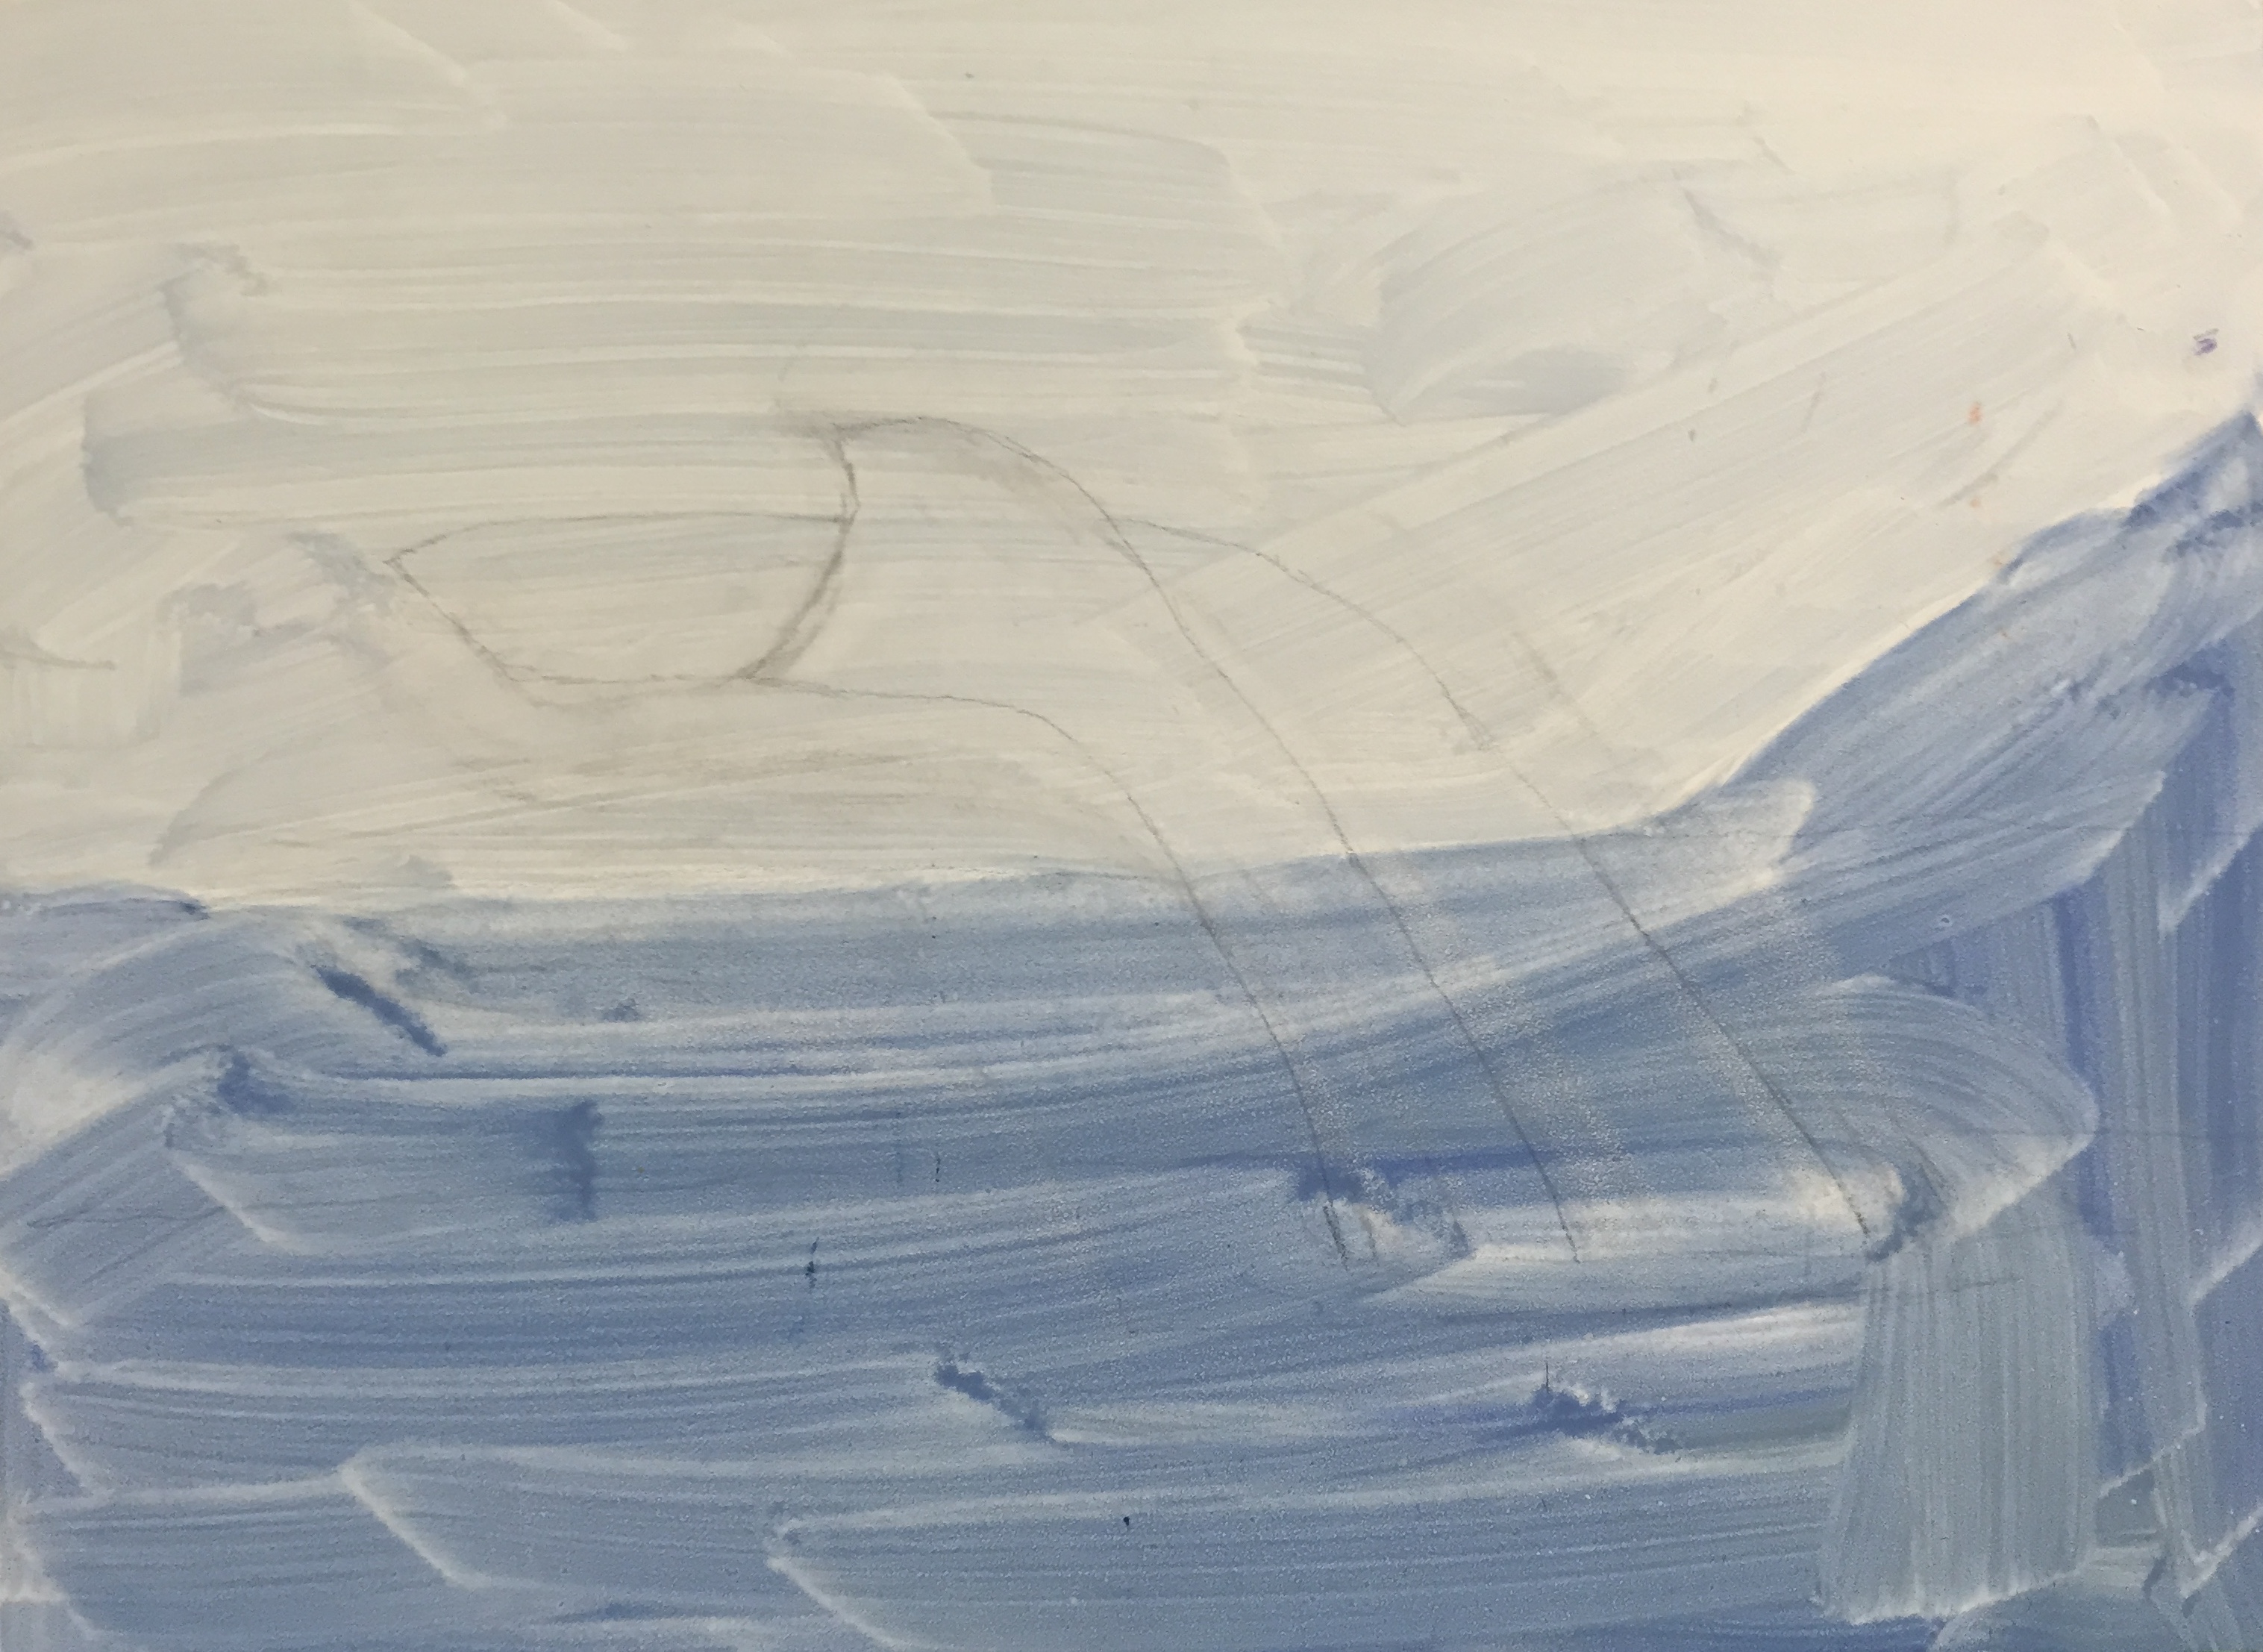
As mentioned in the previous post, the process for creating the dog paw prints wasn’t straightforward. The challenge was finding a way to get the real prints of all 3 dogs on the canvass without having it look like a distorted mess. Sure, there are plenty of reasons to do a piece with the messy prints splayed across the canvass, and I’ll readily admit that is a good idea, too. However, that was not the direction for this project.

The other challenge was ensuring the actual prints of Crash, Boom, and Zip were used. I didn’t want to do a photo-based, realism approach, i.e. take a picture of the paws and free paint the shapes. I really wanted to have the touch and active presence of CBZ on the canvass. This became very important to me as the work progressed because it would be a forever connection to our beloved pups; a way to always reach out and touch their “real” paws.

So if you haven’t barfed from the sentimentality, you appreciate the concept… hopefully. The original thought was to slather some non-toxic kid paint on the dog’s paws and let them run on the canvass. That’s such a bad idea for so many reasons. Just think about it for a minute if you don’t know what I mean. The next idea was to paint the dog’s paws and then press their paws on the canvass myself, in a more or less controlled fashion. Aside from the obvious battle of wills that would ensue, of which I would surely be on the losing side, this doesn’t work well because the prints are muddled with hair marks, making the prints largely indiscernible. I know this because I did a trial with Boom, the mellow dog, by shaving his paws and following the technique noted above on a practice canvass. It looked like poo.

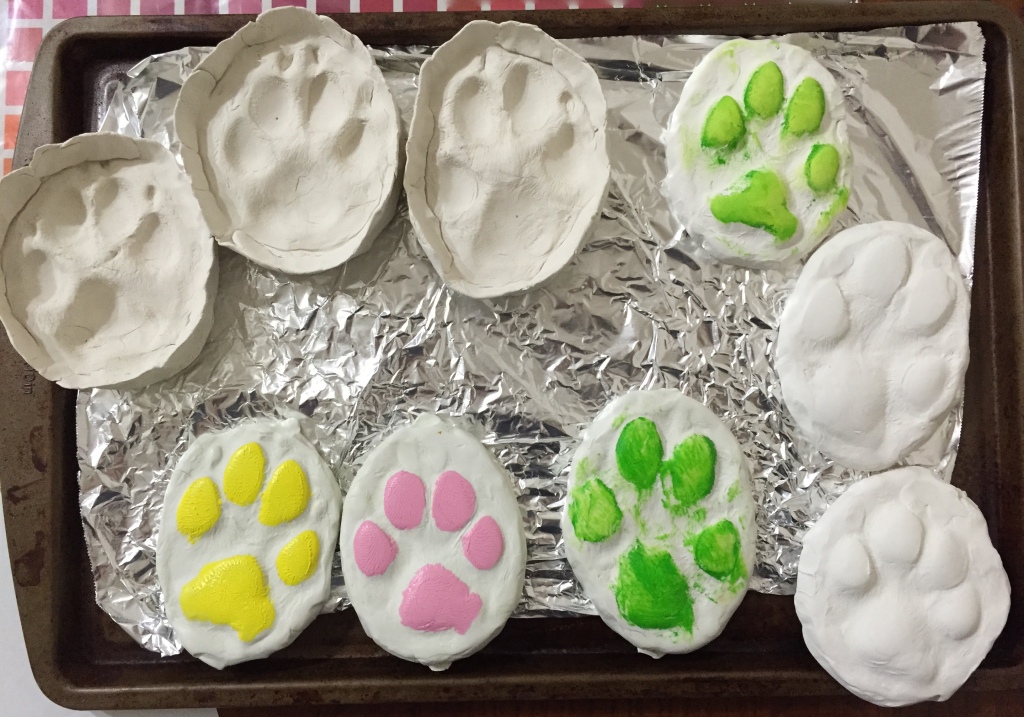
The final answer was molds in molds. The photo included has the molds I used plus one set I didn’t. The 3 molds on the top left and the set of 3 on the bottom left. Process went like this:

  • Pressed the dog’s paw into a round of molding clay.
  • Baked the molds for 30 minutes. These are the top 3 molds in the photo.
  • Using non-drying clay, pressed into the dried molds and pulled them out. These are the bottom 3 colored ones.
  • These non-drying clay molds held their shape, but could be manipulated, so I pressed each one gently down onto a flat surface to flatted out the paw prints so it would transfer the shape better.
  • Applied thin layer of paint to the clay molds and pressed carefully onto the canvass. This provided the general shape and worked surprisingly well.
  • Applied free-hand touch ups and additional layers of paint on paw prints on canvass.

The other 3 molds (on right side of photo) are a failed attempt to create oven dried impression molds as described with the non-drying clay above. They are great 3D molds of the dog’s prints, but turns out the paint doesn’t transfer well to the canvass because the paw pads are too well done, i.e. they are rounded and can’t be pressed flat to make a good stamp. One of those things you try and then feel like a moron for having overlooked such a simple mistake.

All the molds are reusable, so I can recreate this project again if I wanted to. The best part is that my wife gets the painting she asked for, plus a mold of each dog’s front left paw.

French Countryside Loire Valley – Practice sessions continue on 2 fronts

More progress this weekend on the practice sessions for the Loire Valley countryside piece. Added the first pass at details to the sky on the oil on paper. I’ve done clouds in graphite before, but never detailed painting. Learned a lot about what not to do, most notably trying to be too precise and layered paint to thickly. Need to go with looser brush strokes and thinner paint, I think. Advice is welcome, so comment if you have some helpful guidance please.

The second pic below is a practice session on my iPad. Still getting the hang of the Paper 53 app tools, but it’s been very helpful in drafting possible compositional elements that I wouldn’t otherwise have taken the time to do with paint. It’s very limited when compared to real painting and drawing, but it’s an invaluable drafting tool for layout and testing ideas.

IMG_3617 IMG_0002